


Hanging decorative fixtures requires balancing proper structural positioning with the visual impact of colored glass or metal. Learning how to hang blue pendant lights involves calculating the correct clearance above counters or tables, aligning multiple fixtures evenly, and securing the ceiling canopy safely. Blue shades, whether crafted from translucent seeded glass or opaque hammered metal, bring a distinct focal point to kitchens and dining spaces. Planning the drop height and spacing early prevents awkward sightlines and uncomfortable glare across the room.
Electrical safety remains essential whenever you replace an existing fixture or wire a new junction box. You must confirm that the ceiling box supports the fixture weight and shut down power at the main service panel before handling any wiring. Adding secondary accessories, such as indoor lighting timer controls, can also streamline daily operation once your pendants are in place. Taking time to measure the layout and inspect the supplied hardware ensures your hanging lights look balanced and operate reliably.



Complete Step-by-Step Guide to Hanging Blue Pendant Lights
Hanging a blue pendant fixture successfully demands precise physical measurements alongside careful electrical preparation. A successful installation balances practical task illumination over surfaces with the decorative charm of blue glass or enamel shades. Taking the time to map out canopy placement, cord lengths, and ceiling support prevents awkward sightlines or ceiling repairs later. This walkthrough guides you through each phase of mounting from initial layout to final bulb testing.
Calculating Ideal Hanging Heights and Clearances
Standard design practices place the bottom rim of a pendant between 30 and 36 inches above a kitchen island or dining tabletop. This clearance allows people seated or standing across the surface to converse easily without an obstructed line of sight. Higher ceilings often demand additional drop distance to preserve visual balance within the room. A practical rule of thumb adds roughly three inches of hanging height for every foot of ceiling height above the standard eight-foot mark.
In open walkways, entryways, or living spaces without furniture underneath, vertical clearance requirements shift dramatically. You should ensure the bottom of the pendant shade hangs at least seven feet above the finished flooring. Maintaining this seven-foot threshold protects tall household members and visiting guests from bumping their heads against the shade. When mounting above a kitchen sink, align the fixture so the shade sits slightly above eye level while washing dishes.
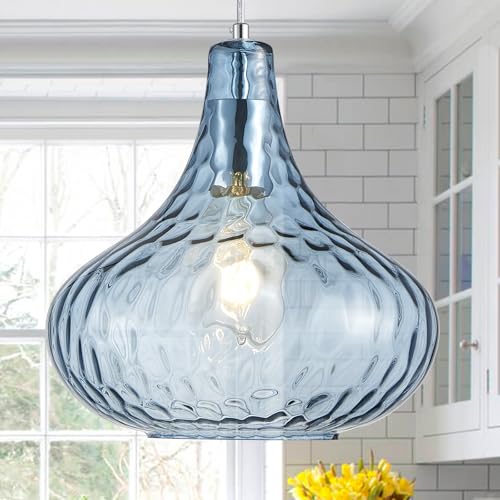
Shade dimensions also influence your vertical clearance decisions. Larger dome fixtures, such as the ELYONA Industrial Pendant Light 12″ Hammered Metal model or the MERINEA 12″ Blue Farmhouse Pendant Light, present substantial visual weight. Hanging wide shades slightly higher often prevents the fixture from overpowering a modest counter space. Conversely, compact single-light glass shades can hang closer to the 30-inch mark without feeling visually overwhelming.
Determining Spacing Across Kitchen Islands and Dining Tables
Proper horizontal spacing prevents your ceiling from appearing cluttered while distributing light evenly across working counters. Begin by measuring the full length of your kitchen island or table surface before drilling any mounting holes. Designers frequently space multiple pendants roughly 24 to 30 inches apart from center to center. You should also ensure the outer pendants sit at least six inches inside the table or island edges.
The total number of fixtures depends directly on the surface length and shade diameter. Long kitchen islands measuring eight feet or more comfortably accommodate three mini pendants, such as the ANYLOVE Vintage Art Blue Pebble Pendant set. Shorter counters of four to five feet usually look most proportional with a pair of fixtures, such as the Audickic 2-Pack 7.5″ Brushed Nickel Pendant lights. If you install an odd number of lights, mount the middle pendant directly above the center point of the island first.
Visual balance requires checking sightlines from adjoining rooms or nearby seating areas. Blue glass fixtures naturally draw the eye because the colored material contrasts sharply with neutral ceilings and walls. Hanging pendants too close together concentrates the blue tint into a single visual block rather than creating an open, rhythmic pattern. Mocking up the spacing using paper plates or inflated balloons suspended by string helps you visualize the arrangement before mounting hardware.
Understanding Blue Shade Materials and Light Diffusion
The shade material of your blue pendant fundamentally controls how illumination spreads throughout the room. Translucent blue glass shades, including the Viinew Mini Glass Pendant Light 1-Pack Dark Blue fixture, emit a luminous ambient glow in all directions. Seeded and hammered textures, as seen on the Emliviar 1-Light Pendant Lighting Hammered Glass shade, scatter light into gentle decorative patterns across ceiling surfaces. These glass options serve as both practical task lighting and eye-catching accent elements.
Opaque fixtures function differently by concentrating illumination strictly downward onto work surfaces. Solid metal designs, such as the ELYONA Industrial Pendant Light 12″ Hammered Metal fixture, prevent lateral light emission and cast a direct pool of illumination onto the counter below. Ceramic fixtures, such as the Shenmoyl Pendant Light with Blue Pleated Ceramic shade, provide a semi-directional beam with soft interior reflection. When evaluating overall room illumination, consider reviewing lumen output considerations for task spaces to determine appropriate brightness levels for your counters.
Pre-Installation Preparation and Electrical Safety Checks
Working safely with household electrical wiring requires careful shutoff procedures before touching any fixtures. Locate your home service panel and switch off the specific circuit breaker controlling the ceiling junction box. Test the existing wiring using a reliable non-contact voltage tester to confirm no electrical current remains active. Never rely merely on a wall switch to disconnect power because multi-way switching can leave live conductors inside the ceiling box.
Examine the structural ceiling box to ensure it is firmly attached to a ceiling joist or an approved support bar. Standard junction boxes hold lighter fixtures securely, but heavier glass or solid metal shades require a robust, weight-rated electrical box. Verify that the mounting ears and internal screw threads of the ceiling box are intact and free of corrosion. If you discover damaged wiring insulation or loose ceiling boxes, consult a qualified electrician before proceeding with the installation.
Preparing the Cord, Downrod, or Suspension Chain
Pendant lights utilize several distinct suspension mechanisms, including adjustable insulated electrical cords, rigid metal downrods, or decorative linked chains. Cord-hung fixtures require loosening the canopy strain-relief collar or setscrew to slide the electrical cord to your desired hanging length. Once the length is established, tighten the strain-relief mechanism to lock the wire in place and prevent tension on the internal electrical connections. Leaving several inches of excess insulated conductor inside the canopy provides slack for future height adjustments.
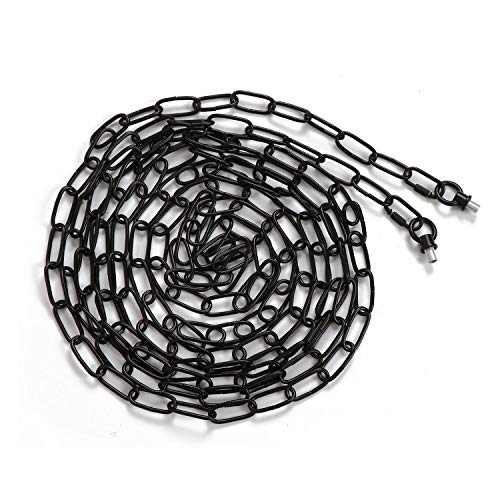
Chain-hung fixtures offer flexible adjustment for high or sloped ceilings while supporting heavier shades securely. For vaulted spaces or two-story foyers, adding an accessory such as the Eumyviv 19ft Heavy Duty Chain for Light Fixture provides ample reach. You can open and close individual chain links using a pair of chain pliers wrapped in electrical tape to avoid scratching the finish. Thread the insulated electrical cord through every second or third link along the chain to maintain a clean, organized appearance.
Step-by-Step Ceiling Canopy Wiring and Mounting
Attach the universal mounting crossbar to the ceiling electrical box using the supplied machine screws. Position the mounting bracket so the threaded studs align with the pre-drilled holes in the fixture canopy. Connect the bare copper or green grounding wire from the ceiling box to the fixture grounding wire and the green grounding screw on the crossbar. Establishing a dependable ground connection represents an essential safety measure that protects against potential short circuits.
Strip approximately half an inch of clean insulation from the ends of the pendant conductors using proper wire strippers. Join the neutral white fixture wire to the incoming white neutral household conductor using a securely twisted wire connector. Next, join the hot black fixture wire to the incoming black household hot wire with another matching connector. Carefully tuck the connected wires into the junction box, align the decorative canopy over the studs, and secure it flush against the ceiling with the finials.
Selecting the Best Bulb Color Temperature for Blue Shades
The color temperature of your bulb dramatically influences how blue glass shades appear when illuminated. Bulbs rated between 2700K and 3000K emit a warm, golden light that creates a cozy, inviting dining ambiance. However, warm yellowish light passing through blue translucent glass can sometimes produce a slightly muted or greenish tint. If preserving the pure blue vibrancy of the shade matters most, look toward neutral white bulbs rated around 3500K or 4000K.
Color rendering index ratings also play a key role when illuminating colorful decorative fixtures. Bulbs featuring a high color rendering index of 90 or greater reveal the rich saturation of blue glass accurately. Most blue pendant designs, such as the 11 Inch Blue Hammered Glass Pendant Light Brushed fixture or the MERINEA 12″ Blue Farmhouse Pendant Light, incorporate a standard medium E26 socket. Always confirm that your chosen bulb matches the manufacturer socket specifications and operates safely within the listed maximum wattage rating.
Dimming compatibility offers valuable control over ambient mood and task performance across the day. Pairing dimmable LED bulbs with an approved wall dimmer allows you to soften bright task light into a gentle evening accent. Always verify that your LED bulbs explicitly list dimmable operation on their packaging to avoid buzzing or erratic light strobing. Using quality dimmable bulbs ensures your blue glass pendants provide both bright kitchen task illumination and relaxed late-night ambiance.
Straightening Cords, Leveling Shades, and Fine-Tuning Alignment
Newly installed cord-hung pendants frequently display minor kinks or curves after being coiled inside packaging. The natural weight of the glass or metal shade typically pulls the cord straight over a few days of normal hanging. You can accelerate this relaxing process by gently warming the insulated cord with a household hairdryer set on low heat. Never apply high heat directly to electrical wiring, as excessive temperature can soften or degrade the protective outer insulation.
Leveling multiple pendant shades across an island requires meticulous visual and physical checking. Place a lightweight torpedo level across the rim of each shade to ensure the fixture hangs perfectly horizontal. If a shade tilts slightly, check whether the shade-retaining socket ring is seated squarely on its threads. Releasing the socket ring, repositioning the glass shade evenly, and gently re-tightening the threaded collar often resolves minor tilts immediately.
Troubleshooting Common Pendant Hanging Problems
If a newly installed pendant fails to turn on after restoring breaker power, retrace your electrical connections systematically. Turn the circuit breaker back off before lowering the canopy to inspect the wire connectors. Confirm that the hot and neutral wire nuts have not slipped loose during the process of pushing wires into the ceiling box. You should also test the light bulb in a known functioning lamp to verify that the bulb itself is operational.
Canopy gaps between the ceiling drywall and the decorative trim plate represent another common cosmetic complaint. Uneven ceiling plaster or a protruding junction box can prevent the canopy from resting completely flush against the surface. Adjusting the depth of the mounting crossbar studs backward into the box allows the finials to pull the canopy tighter. If persistent flickering occurs once power is restored, check that your wall switch is rated for the specific wattage of your LED bulbs.
Routine Maintenance and Care for Blue Fixtures
Maintaining the vivid visual clarity of blue glass pendants requires periodic dusting and gentle cleaning. Cooking vapors and airborne grease in kitchen environments naturally form a thin film on glass over time, dulling the rich color. Shut off the wall switch and allow bulbs to cool completely before performing any maintenance on hanging fixtures. Wiping the exterior shade with a dry microfiber cloth every couple of weeks prevents grease from setting onto the textured surface.
Deep cleaning textured or hammered glass shades requires a damp microfiber cloth moistened with mild, diluted soapy water. Never spray commercial glass cleaners or abrasive liquids directly onto the hanging fixture where mist could enter the electrical socket. For hammered metal dome pendants, stick strictly to soft cloths and pH-neutral cleaners to safeguard the protective lacquer or painted finish. Inspect the hanging hardware and shade rings annually to ensure all mechanical connections remain secure over time.
Final Practical Alignment and Review
Taking a final step back to evaluate your lighting arrangement ensures both aesthetic appeal and practical performance. When illuminated, your blue pendants should provide comfortable visibility across your work surface without creating dark shadows or excessive glare. The bold hue of blue shades offers an enduring style statement that elevates the entire room when hung with precision. With proper hanging height, secure wiring, and suitable bulb selection, your new fixtures will deliver reliable illumination for years ahead.





Write Your Review
No reviews yet. Be the first to share your experience!