


A 60-inch vanity cabinet provides generous counter space, but poor illumination can cast harsh shadows across your face or make a spacious bathroom look unbalanced. Figuring out what size vanity light for 60 inch vanity counters requires looking closely at your mirror layout and sink placement. Standard interior design practices suggest selecting an overhead light bar that spans roughly 70 to 75 percent of the mirror width, which usually translates to a 40- to 48-inch single fixture. If your layout features two separate sinks, dividing the illumination across a pair of smaller fixtures or flanking wall sconces often yields far better results.
Mirror dimensions and ceiling clearance play a major role alongside the actual vanity cabinet. Much like the careful proportional balancing needed when hanging decorative pendant fixtures, vanity illumination requires balancing functional task brightness with comfortable viewing height. Understanding these proportional rules prevents harsh overhead glare, minimizes dark facial shadows, and ensures your grooming area stays evenly lit. Taking accurate measurements before purchasing ensures your fixtures complement the room while providing clear, practical light.
Complete Sizing and Placement Guide for 60-Inch Bathroom Vanities
Choosing the right lighting fixture for a 60-inch vanity begins by understanding how fixture dimensions interact with mirror placement, sink count, and ceiling height. A standard 60-inch vanity cabinet is wide enough to accommodate either a single large mirror or two individual mirrors centered over dual basins. For a continuous single mirror measuring between 54 and 58 inches wide, a single overhead vanity bar between 40 and 48 inches long delivers balanced, flattering light. When the vanity uses two smaller mirrors over separate sinks, installing two separate fixtures between 16 and 22 inches wide produces superior illumination without visual clutter.
The Fundamental Proportional Rules for 60-Inch Vanity Lighting
Lighting proportion is based primarily on the width of the mirror rather than the outer edges of the vanity countertop. A common guideline among home decorators is the 75 percent rule, which states that an overhead lighting fixture should measure approximately two-thirds to three-quarters of the width of the mirror beneath it. Applying this formula prevents the light from looking disproportionately small while avoiding overhang past the mirror edges. If your 60-inch vanity features a 48-inch mirror, an overhead fixture measuring between 34 and 36 inches wide balances the composition smoothly.
A light bar should never extend wider than the mirror frame or cabinet border. Overhanging fixtures create an awkward top-heavy silhouette that draws unwanted attention toward the ceiling. Conversely, an undersized fixture leaves the outer edges of the counter in darkness and casts severe vertical shadows down the sides of the face. Striking the right balance ensures the light beam covers the entire sink perimeter where daily personal grooming occurs.
Single Mirror Versus Dual Mirror Configurations on a 60-Inch Counter
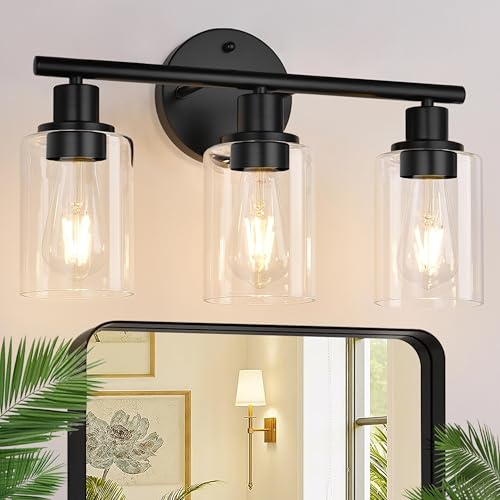
A 60-inch vanity cabinet frequently serves as a double-sink installation in primary bathrooms. In a dual-sink layout, homeowners typically mount two separate mirrors, each roughly 20 to 24 inches wide, centered directly over each sink basin. Placing two dedicated fixtures, such as the Zarbitta 3-Light Bathroom Light Fixtures with its 17.23-inch width, centered above each mirror provides dedicated task lighting for each user. This dual-fixture approach keeps illumination symmetrical, eliminating the awkward shadows that a single central light would cast over two separated basins.
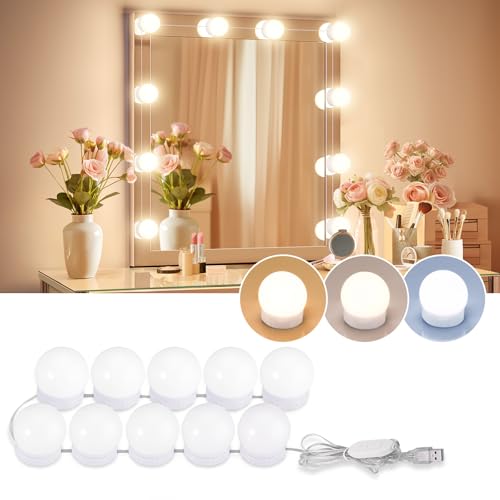
When a 60-inch vanity features a single large mirror spanning nearly the entire cabinet length, a single elongated fixture is often preferred. You can also utilize modular solutions such as the Consciot LED Vanity Lights for Mirror, which features 10 dimmable bulbs that adhere directly around the frame perimeter. Adjustable wire lengths allow this style of DIY Hollywood kit to fit custom glass dimensions without requiring multiple electrical rough-in boxes. Deciding between a single continuous fixture and twin fixtures depends heavily on whether your plumbing rough-in supports one or two sinks.
Wall Sconces and Vertical Flanking Options
Vertical wall sconces mounted on either side of the mirror represent one of the most effective ways to eliminate facial shadows. When light originates strictly from overhead, brow bones, noses, and chins cast harsh downward shadows that complicate grooming tasks like shaving or makeup application. Installing sconces at eye level creates cross-illumination that fills in those dark contours evenly. Much like the principles applied when positioning task lighting to prevent glare, bathroom wall sconces should deliver soft, diffused illumination directly toward the face.
On a 60-inch vanity with a double mirror configuration, a three-sconce layout provides outstanding visual balance and functional brightness. In this arrangement, one sconce mounts to the far left, a second sconce sits in the center between the two mirrors, and the third sconce mounts to the far right. Sconces in this configuration should typically measure between 4 and 6 inches wide to fit comfortably within the wall space. Homeowners should aim for roughly 36 to 40 inches of space between matching sconces to maintain balanced side-to-side lighting.
Mounting Height and Vertical Clearance Guidelines
Determining the correct vertical placement for vanity lighting is just as critical as choosing the correct width. For overhead fixtures installed above the mirror, the center of the mounting plate should generally sit approximately 75 to 80 inches above the finished floor. This elevation places the light source slightly above eye level for most adults, preventing direct glare while illuminating the face from an optimal angle. Additionally, leaving about 2 to 4 inches of clearance between the top edge of the mirror frame and the bottom of the lighting fixture creates a clean, uncluttered visual break.
Ceiling height and crown molding can sometimes limit the vertical space available above a large bathroom mirror. In bathrooms with standard 8-foot ceilings, an oversized mirror can push overhead fixtures too close to the ceiling line, trapping heat and creating glare. Reversible fixtures offer valuable flexibility in these tight situations because the shades can point upward or downward. Pointing the shades downward directs focused light onto the counter, while pointing them upward reflects softer ambient illumination off the ceiling.
Calculating Brightness, Lumen Requirements, and Color Temperature
Adequate brightness is essential for task-oriented spaces like bathroom vanities, but excessive intensity can cause blinding glare. A 60-inch vanity typically requires an overall light output of roughly 1,600 to 2,400 lumens across all active fixtures. If you install two three-light fixtures, each socket only needs a bulb delivering about 300 to 400 lumens to achieve this target easily. Distributing lumens across multiple bulbs creates softer, more diffused illumination than relying on a single ultra-bright bulb.
Color temperature, measured in kelvins, strongly influences how skin tones and cosmetics appear in the mirror. Warm white light around 2700K produces a cozy ambiance but can introduce an overly yellow tint that obscures subtle color differences. Neutral white light between 3000K and 4000K closely mimics clean daylight and is generally considered ideal for grooming. Some modern systems, including tunable LED kits with 3000K, 4000K, and 6500K options, allow users to shift between warm relaxation lighting and crisp morning task light with the press of a button.
Socket Types, Dimming Capabilities, and Electrical Controls
Choosing the right socket design determines your future bulb options and thermal safety. Standard medium-base E26 ceramic sockets remain the most reliable choice because ceramic resists long-term heat far better than basic plastic housings. A UL-certified ceramic socket provides peace of mind when operating multiple incandescent or vintage-style Edison bulbs. Furthermore, ceramic sockets accommodate a wide variety of dimmable LED replacement bulbs, allowing homeowners to customize their lumen output over time.
Incorporating dimming controls transforms a bright morning grooming station into a relaxing evening retreat. When shopping for vanity lights, verify whether the fixture works with standard wall-mounted dimmer switches or features an integrated manual dimmer. Products with built-in memory functions retain your preferred brightness setting when turned back on, saving you from readjusting the dimmer daily. Pairing dimmable bulbs with a compatible LED-rated dimmer switch prevents unwanted humming, buzzing, and flickering.
Installation Preparation, Mounting Security, and Moisture Ratings
Bathrooms present unique environmental challenges due to shower steam and shifting humidity levels. Lighting fixtures installed near sinks and bathtubs should carry appropriate damp-location certifications to protect electrical components from corrosion. Sturdy metal lamp bodies with durable mounting rings keep heavy glass shades anchored firmly in place over years of daily use. Always ensure that the electrical wall box is securely anchored to a wall stud or supported by an approved heavy-duty drywall bracket before hanging an all-metal fixture.
Renters or homeowners seeking a non-invasive installation can opt for adhesive LED kits that bypass traditional electrical junction boxes. Adhesive fixtures powered by standard USB connections attach directly to the mirror glass without requiring drilling or drywall modifications. However, permanent hardwired fixtures connected to an existing wall switch require turning off power at the main circuit breaker prior to handling any wires. If you feel uncomfortable handling residential electrical wiring, hiring a licensed electrician ensures a safe, code-compliant installation.
Maintaining Fixture Finishes and Long-Term Durability
High humidity can take a toll on decorative metal finishes if fixtures lack protective surface coatings. Upgraded matte black coatings with scratch-resistant and tarnish-resistant properties prevent moisture from corroding the underlying metal pole and backplate. Clear glass shades, while elegant, easily collect aerosol hairspray mist, water spots, and household dust over time. Inspecting your fixtures every few months allows you to spot minor surface oxidation or loose holding rings before they become serious hazards.
Cleaning bathroom fixtures requires gentle care to avoid degrading delicate factory sealants. As with properly cleaning and maintaining fixtures in other rooms of the house, harsh chemical cleaners and abrasive scouring pads should be strictly avoided. Wiping metal surfaces with a lightly dampened microfiber cloth removes soap residue and steam marks safely. Removing glass shades periodically to wash them in warm soapy water restores optical clarity and keeps your vanity area looking bright and fresh.
Practical Troubleshooting for Common Vanity Lighting Mistakes
One of the most frequent mistakes on 60-inch vanity setups is installing a fixture that is either significantly too wide or excessively narrow. An undersized single light bar centered over a wide mirror creates dark corners and forces users to lean in awkwardly to see clearly. Conversely, an oversized fixture that extends past the edges of the mirror creates visual clutter and can interfere with adjacent tall medicine cabinets or side walls. Carefully checking the dimensions of your mirror before selecting a fixture prevents these common layout blunders.
Another common problem is harsh glare caused by clear glass shades paired with unshielded, high-lumen clear bulbs. Clear glass allows maximum illumination to escape, but direct filament exposure can strain your eyes during early morning routines. Switching to frosted or milky LED bulbs softens the output and distributes the light rays evenly across the counter. If shadows remain an issue under your chin, consider adding low-profile vertical sconces to balance out an existing overhead light bar.
Summary of Sizing Guidelines for 60-Inch Bathroom Vanities
Selecting the best lighting configuration for your 60-inch vanity comes down to mirror width, sink arrangement, and personal routine. For a wide single mirror, choose an overhead fixture measuring between 40 and 48 inches wide to maintain the recommended 75 percent proportion. If your vanity features two separate mirrors over dual sinks, twin fixtures between 16 and 22 inches wide provide targeted illumination for each grooming station. Taking accurate measurements and balancing lumen output ensures your bathroom remains both functional and visually appealing for years to come.
Keep in mind that lighting should always adapt to the specific dimensions of your bathroom rather than a rigid formula. Factor in ceiling height, wall boundaries, and natural window light when finalizing your fixture placement. Whether you choose permanent hardwired black metal fixtures with reversible mounting or a flexible adhesive Hollywood light kit, balanced illumination enhances your daily routine. With thoughtful planning and proper sizing, your 60-inch vanity will deliver clear, flattering light every single day.




Write Your Review
No reviews yet. Be the first to share your experience!