


Upgrading illumination above a bathroom vanity instantly refreshes the room while providing the balanced visibility needed for daily grooming routines. Many homeowners hesitate when approaching electrical updates because modern damp environments require careful attention to junction boxes, grounding conductors, and moisture exposure. Learning how to wire a bathroom light fixture demystifies the electrical connections and allows you to replace an outdated vanity bar or ceiling light with total confidence. When replacing wall sconces or overhead lights, similar electrical techniques apply to securing ceiling-mounted light fixtures and managing overhead junction boxes safely.
Before handling any electrical components, verifying that the circuit breaker is shut off remains the fundamental rule of residential wiring. Hardwired bathroom luminaires typically require connecting matching copper conductors, securing terminal wire nuts, and attaching a sturdy mounting bracket to an approved electrical box. Modern fixtures like the FadimiKoo 2-Light Black Bathroom Lighting Over or flush mounts such as the SKEJAO Flush Mount Ceiling Light Fixture,3-Light rely on standardized color-coded wiring that simplifies DIY replacement. With a few standard hand tools and strict attention to electrical safety practices, you can complete the upgrade cleanly in an afternoon.


Practical Guide to Bathroom Light Fixture Wiring and Installation
Wiring a bathroom light fixture is a manageable home electrical project when approached with method, caution, and clear procedural understanding. Proper illumination above a vanity mirror or across the ceiling elevates room aesthetics while providing the visibility needed for daily grooming tasks. The process involves disconnecting the branch circuit, preparing the electrical junction box, and securing color-matched conductors using approved wire connectors. Taking time to understand the role of each conductor guarantees a secure installation that delivers dependable service.
Understanding Bathroom Circuit Safety and Power Disconnection
Residential electrical safety begins at the main service panel, where power to the bathroom lighting circuit must be completely disconnected before touching any components. Bathrooms often feature shared circuits that power both overhead lighting and GFCI convenience receptacles, so switching off the wall toggle is never sufficient. Always flip the dedicated circuit breaker switch to the off position, and consider placing a piece of electrical tape across the handle to prevent accidental reactivation. Use a reliable non-contact voltage tester directly against the switch box and the existing fixture canopy to confirm that no live voltage remains.
Modern electrical codes generally require bathroom branch circuits to supply twenty amperes, often with GFCI protection upstream to safeguard against moisture-related faults. If your bathroom wiring ties into a GFCI outlet near the sink, any downstream wiring must remain properly isolated from unintentional ground paths to prevent nuisance tripping. Older homes may feature fifteen-ampere circuits supplying general lighting, which requires verifying that conductor gauges match the existing overcurrent protection device. If you encounter aluminum wiring, brittle cloth insulation, or an overcrowded junction box, pausing work to consult a licensed professional ensures personal safety.
Inspecting the Wall Junction Box and Existing Wiring
Once power is cut, removing the old fixture reveals the underlying junction box, which acts as the structural and electrical foundation for the installation. Bathroom wall fixtures typically mount to a round or octagonal junction box fastened securely to a wall stud or supported by an internal bracket. Inspect the box to verify that it is rigidly anchored and capable of supporting the physical weight of your replacement fixture. A loose electrical box must be tightened against the framing before attaching new mounting hardware to prevent movement during routine cleaning.
Inside the electrical box, you will typically find insulated copper conductors supplying incoming power from the wall switch. In standard residential alternating-current wiring across North America, the black insulated wire serves as the hot conductor that delivers power when the switch is activated. The white insulated wire acts as the neutral conductor, which completes the circuit by carrying current back to the service panel. A bare copper wire or green insulated wire represents the equipment grounding conductor, which routes stray electrical current safely to ground during an internal fault.
Some bathroom junction boxes contain multiple cable sheaths, particularly when power feeds through the ceiling box before traveling downward to the switch. In a switch-loop configuration, a white wire may be repurposed as a hot conductor, which should be marked with black electrical tape near its stripped end. Taking a clear photograph of the existing wire connections prior to disconnecting the old luminaire provides an invaluable visual reference. Tagging ambiguous conductors with small pieces of labeled tape helps prevent wiring errors when the new fixture is ready for installation.
Gathering Essential Electrical Tools and Materials
Completing an electrical project smoothly requires gathering the correct tools and mounting supplies before beginning the physical connections. Essential hand tools include a set of insulated screwdrivers, a wire stripper sized for 14-gauge and 12-gauge solid copper conductors, and needle-nose pliers for shaping wire leads. A reliable non-contact voltage detector is essential for verifying that the work zone remains completely de-energized throughout the installation. Keep a roll of vinyl electrical tape, several plastic wire nuts, and a small magnetic torpedo level nearby to align the fixture properly.
Preparation also involves protecting the surrounding bathroom surfaces from dropped screws, dust, and tool impacts. Spreading a canvas drop cloth or folded towel over the vanity countertop and sink basin prevents scratched porcelain and stops tiny mounting nuts from falling down the drain. If your fixture mounts high on the wall or on the ceiling, position a stable step stool on dry flooring rather than stretching from an awkward angle. Supplemental lighting from a battery-powered work lamp keeps your hands free and illuminates the junction box clearly while house power is disconnected.
Preparing and Mounting the Fixture Bracket
Most replacement luminaires include a stamped steel mounting plate designed as a circular crossbar or a rectangular bracket with multiple mounting slots. Fasten this mounting bracket directly to the threaded ears of the junction box using the machine screws provided in the hardware packet. Align the bracket horizontally if installing an elongated vanity fixture, using a small torpedo level to guarantee straight orientation above your bathroom mirror. Modern vanity lights such as the FadimiKoo 2-Light Black Bathroom Lighting Over feature versatile backplates that can be mounted horizontally above a mirror or vertically between dual vanities.
The mounting bracket serves an electrical function in addition to structural support by bonding the fixture frame to the household grounding system. Ensure the green grounding screw on the mounting crossbar is tightened securely against the metal plate. If your junction box is metal, the incoming bare ground wire should wrap around this ground screw before connecting to the luminaire ground wire. Plastic junction boxes require joining the household bare ground wire directly to the fixture grounding lead using a suitable wire connector, with a short pigtail extending to the bracket screw.
Before making final wire connections, thread the decorative mounting studs or threaded center nipple through the bracket to the appropriate depth. Test-fit the fixture canopy over these threaded studs to verify that enough thread protrudes through the decorative faceplate to receive the cap nuts. Adjusting the stud depth now prevents the frustration of discovering that the mounting bolts are too short after all electrical splices are finished. Once the bracket is level and the mounting studs are locked into place with their hex nuts, the assembly is ready for electrical splicing.
Making Secure Electrical Splices Step by Step
Electrical splicing connects the internal wiring of the luminaire to the permanent branch circuit wiring inside the wall box. If the stripped ends of the house conductors show signs of nicking or severe twisting, trim them back slightly and strip approximately three-quarters of an inch of clean insulation. Always connect the equipment grounding conductors first, twisting the fixture bare or green wire together with the household ground wire using an approved wire nut. Establishing a reliable ground connection early provides an essential protective path before touching hot or neutral conductors.
Next, join the neutral conductors by holding the stripped ends of the white fixture lead and the white household wire parallel to each other. Thread a twist-on wire nut clockwise over the exposed copper strands, turning firmly until the connector bites deeply into the metal and twists the wires together. Follow the same procedure for the hot conductors, connecting the black wire from the light fixture to the black or switched-hot wire from the junction box. Similar principles regarding careful conductor termination and structural support apply when maintaining electrical lighting fixtures throughout the rest of your home.
After twisting each wire connector into place, perform a gentle tug test by lightly pulling each individual wire while holding the plastic nut firmly. If any conductor slips out or feels loose inside the connector, remove the nut, straighten the copper strands with needle-nose pliers, and remake the splice. Never leave exposed bare copper visible beneath the skirt of the wire connector, as uninsulated hot conductors can short against grounded metal brackets. For extra security in humid bathroom environments, some installers apply a smooth wrap of electrical tape around the base of each wire nut where the conductors enter.
Tucking Conductors and Securing the Fixture Canopy
With all splices completed and verified, the next critical step is packing the conductors neatly inside the junction box cavity. Carefully fold the insulated wires accordion-style into the back of the electrical box, pushing the neutral and hot bundles toward opposite corners. Keep the bare grounding conductors separated from the insulated splices so they cannot abrade or wedge against wire nuts. Neatly organized wiring prevents conductor insulation from being pinched or sliced when the fixture canopy is pressed flush against the finished wall surface.
Position the fixture canopy over the mounting plate, aligning the pre-drilled holes in the backplate with the protruding threaded studs. Press the base firmly against the wall, checking that no stray wires protrude around the perimeter of the metal housing. Thread the decorative cap nuts onto the mounting studs by hand, tightening them evenly to draw the fixture tight against the drywall. For ceiling-mounted installations like the SKEJAO Flush Mount Ceiling Light Fixture,3-Light, ensure the wide base sits completely flush without tilting to keep steam and humidity away from internal wiring.
Bulb Wattage, Color Temperature, and Dimming Compatibility
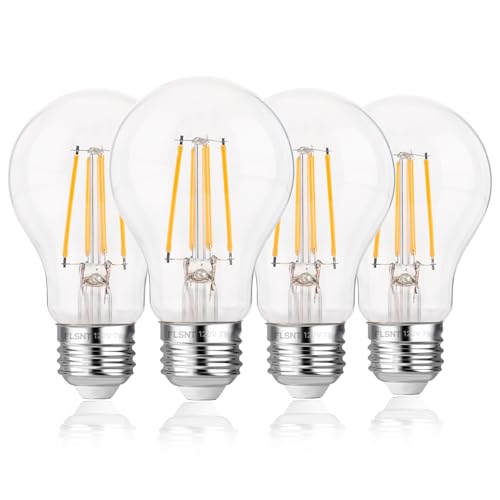
After securing the fixture body, equip the sockets with bulbs that match the manufacturer electrical specifications and socket ratings. Standard bathroom vanity fixtures and flush mounts frequently utilize medium E26 screw bases, which typically support a maximum of 60 watts per socket. Exceeding the stated wattage limit can cause excessive heat buildup inside the sockets and damage wiring insulation over extended periods. Modern LED bulbs provide substantial brightness while drawing only a fraction of the power of traditional incandescent filaments, reducing thermal stress on internal fixture components.
Selecting the appropriate color temperature is particularly important in bathroom spaces where grooming, makeup application, and shaving take place. Bulbs rated between 2700K and 3000K emit a warm, relaxing glow that mimics traditional incandescent lamps, creating a soothing ambiance in powder rooms. Options rated near 3500K to 4000K deliver a cleaner, neutral white illumination that renders skin tones naturally without yellowish distortion. Balancing functional brightness with visual comfort mirrors the principles used when planning focused task lighting across dedicated living zones.
If your bathroom lighting circuit connects to a wall dimmer, ensure both the selected bulbs and the dimmer switch are rated for dimmable LED operation. Non-dimmable LED bulbs placed on a dimmer circuit often produce annoying buzzing noises, visible strobing, or erratic shutoffs at lower light levels. Both the SKEJAO flush mount and the FadimiKoo vanity sconce support smooth dimming functionality when paired with compatible dimmable E26 bulbs and modern electronic dimmer switches. Verifying dimming compatibility before restoring power prevents unnecessary bulb replacements and ensures dependable lighting control.
Placement Considerations: Vanity Sconces vs Ceiling Mounts
Bathroom lighting layouts generally divide into wall-mounted vanity sconces and overhead ceiling flush mounts, each presenting distinct installation characteristics. Vanity sconces focus direct task illumination across the mirror surface to eliminate harsh under-eye shadows during daily grooming routines. Installing sconces vertically on both sides of a mirror at approximate eye level provides the most even facial lighting. Overhead fixtures, in contrast, provide ambient room coverage and require securing heavier frames against ceiling junction boxes while working on a stable platform.
Environmental moisture ratings represent another essential consideration when planning bathroom fixture placement. Luminaires positioned directly above showers or within bathtub splash zones must feature an explicit wet-location or damp-location certification to resist corrosion and moisture intrusion. For dry bathroom zones away from direct spray, open metal designs with durable matte finishes provide dependable protection against ambient steam. In powder rooms or secondary closets lacking hardwired wall boxes, stick-on alternatives like the YUNLEX Motion Sensor Night Light Battery Operated offer convenient, cordless illumination without requiring structural wall modifications.
Battery-operated accent units operate entirely independently of household line voltage, utilizing three AAA batteries and compact motion sensors. While battery lights cannot replace primary high-lumen vanity illumination, their adjustable 1 to 15-lumen output provides convenient nighttime guidance without switching on bright overhead circuits. Understanding the boundary between hardwired line-voltage fixtures and auxiliary battery lights helps homeowners choose practical solutions for every area of the home. Where hardwired junction boxes exist, completing proper line-voltage splices remains the most durable and visually unified lighting solution.
Troubleshooting Common Bathroom Wiring Problems
Once installation is complete, restoring circuit breaker power allows you to test the light switch and verify operation. If the light fails to illuminate upon flipping the switch, immediately turn off the breaker before investigating the underlying cause. Common issues include an unseated bulb, a tripped GFCI outlet upstream on the circuit, or a loose hot wire splice inside the junction box. Checking that the switch leg delivers voltage with your non-contact tester quickly isolates whether the problem stems from the fixture or the incoming supply.
Nuisance tripping of a GFCI device after installing a new light fixture usually indicates a cross-connection between neutral and ground conductors. If a bare copper ground wire inadvertently touches a neutral terminal screw or exposed copper splice, the GFCI detects an imbalance and shuts off power instantly. Disassembling the canopy and verifying that all splices remain neatly insulated with wire nuts usually resolves the fault quickly. Ensuring that wires are tucked cleanly without ground wires pressing against neutral conductors restores reliable GFCI operation.
Persistent electrical issues such as humming switches, sparking, burning odors, or flickering that resists bulb replacement demand immediate attention. If your circuit breaker repeatedly trips upon activation, an internal direct short circuit exists between the hot conductor and a grounded surface. Never attempt to force a tripping circuit breaker to remain on, as this bypasses crucial safety safeguards designed to prevent electrical fires. When home wiring exhibits erratic behavior or when existing wall boxes lack clear grounding paths, consulting a qualified licensed electrician is always the safest course of action.
Long-Term Maintenance and Final Verification
Routine ownership care ensures that your newly wired bathroom fixture remains visually attractive and electrically sound over years of daily operation. Turn off the light switch and allow bulbs to cool completely before dusting metal surfaces with a dry microfiber cloth or soft duster. Avoid spraying liquid household cleaners directly onto open sockets, wiring channels, or exposed electrical components, as trapped moisture promotes internal contact corrosion. Checking the tightness of decorative canopy nuts periodically prevents the fixture from shifting or loosening due to door vibration or routine cleaning contact.
Mastering the fundamentals of residential electrical connections gives you the capability to upgrade bathroom ambiance safely and cost-effectively. By following systematic safety protocols, de-energizing the circuit, and securing color-coded conductors with quality wire nuts, you achieve an installation that is both structurally sound and code compliant. Whether mounting a multi-light vanity sconce over a mirror or securing an ambient flush mount overhead, careful craftsmanship delivers reliable performance. Taking pride in each step of the installation ensures your bathroom enjoys bright, dependable illumination for years to come.




Write Your Review
No reviews yet. Be the first to share your experience!