


Narrow residential corridors often suffer from inadequate illumination because standard architectural layouts tuck them away from exterior windows. Homeowners frequently struggle with casting harsh shadows or creating an unwelcoming tunnel effect when relying on a solitary, outdated overhead fixture. Understanding how to bring light into a dark hallway requires balancing fixture placement, lumen output, and reflective interior elements to produce an open, inviting pathway. By selecting fixtures that diffuse light evenly across walls and floors, you can eliminate dark corners without creating distracting glare.
Effective corridor lighting relies on a thoughtful combination of reliable hardware and balanced bulb specifications. Replacing an underperforming fixture with a modern ceiling mount or pairing natural light bulbs with pale wall finishes can completely transform a neglected passageway. The right approach ensures safe footing throughout the evening while keeping daytime traffic feeling bright and connected to neighboring living areas.

Complete Strategies for Illuminating Dark Hallways and Corridors
Brightening a windowless corridor requires an intentional combination of primary overhead illumination, secondary accent lighting, and optical reflection. A solitary central bulb usually leaves the far ends of a hallway in deep shadow, making the entire passage feel cramped and cavernous. Resolving this issue begins with calculating the appropriate lumen levels for the square footage and choosing fixtures that cast illumination outward rather than strictly downward. When you align fixture clearance with appropriate bulb color temperature, the space immediately feels safer and visually expansive.
Assessing Corridor Dimensions and Calculating Proper Lumen Output
Hallways demand a balanced level of ambient brightness that provides safe navigation without overwhelming someone walking from a dimly lit bedroom. Lighting specialists generally recommend providing ten to twenty foot-candles of light on corridor surfaces, which translates roughly to ten to twenty lumens per square foot. To determine the base illumination your hallway requires, multiply the length of the hall by its width to calculate total square footage, then multiply that figure by fifteen lumens. A corridor measuring eight feet long by four feet wide requires roughly four hundred and eighty lumens, while a twenty-foot passage may need twelve hundred lumens or more distributed across multiple points.
Relying on a single intense light source to satisfy the total lumen requirement creates harsh hotspots and stark contrast. In a long hallway, single-point illumination casts long shadows behind anyone walking through the space, creating visibility blind spots near doorways. Distributing that total output among multiple lower-wattage fixtures produces a soft, uniform field of light that washes across the walls. Spreading light sources every six to eight feet along the ceiling line ensures consistent coverage from one end of the corridor to the other.
Ceiling height plays a decisive role in determining which fixture profile will function safely within the space. Standard eight-foot ceilings leave little headroom for dangling pendants or elaborate chandeliers, which can obstruct sightlines and create collision risks for taller occupants. Corridors with low ceilings require low-profile hardware that stays tight against the drywall while spreading rays horizontally. Spaces equipped with higher ceilings offer more vertical clearance, permitting semi-flush options that bounce ambient light off the ceiling surface itself.
Selecting Flush Mount and Overhead Ceiling Hardware
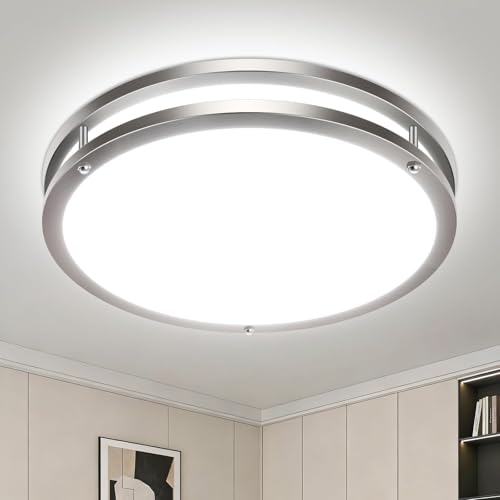
Flush mount ceiling fixtures remain the practical standard for residential corridors because they maximize overhead clearance while distributing broad illumination. A dual-socket fixture, such as a black metal flush mount with an open geometric frame, provides ample illumination by housing two independent bulbs without trapping heat inside enclosed glass. Open-cage designs allow light to project outward across three hundred and sixty degrees, washing adjacent walls rather than focusing all output on the floorboards directly underneath. This lateral light distribution visually widens narrow walls, making the architectural transition between rooms feel seamless.
Semi-flush mount fixtures suspend the light source a few inches below the ceiling plane, allowing a portion of the illumination to bounce upward against the ceiling paint. This upward reflection creates an ambient halo effect that softens glare and makes a compact corridor feel substantially taller. Homeowners should verify that any semi-flush model maintains at least seven feet of clearance from the bottom of the fixture to the finished floor. If your hallway ceiling stands below eight feet, stick strictly to true flush mount units to preserve necessary head clearance.
For especially narrow or drop-ceiling installations, architectural alternatives can deliver uniform brightness without physical clutter. While traditional residential corridors favor flush mounts, exploring commercial solutions like recessed ceiling panels demonstrates how broad surface diffusion prevents harsh glare across long pathways. Recessed disc lights or flush metal cages provide similar low-profile benefits in standard drywall ceilings. Selecting durable steel or iron construction with protective finishes helps the hardware withstand dust and everyday residential wear over years of service.
Optimizing Bulb Base Selection, Wattage Limits, and Color Temperature
Fixture hardware provides the structural housing, but the chosen bulbs determine the visual quality and comfort of the light. Most residential hallway fixtures employ standard medium E26 screw bases, which accommodate a wide range of LED, compact fluorescent, and halogen options. Manufacturer specifications typically establish a maximum wattage rating per socket, such as sixty watts maximum per bulb in a two-light fixture. Exceeding rated fixture wattages introduces hazardous heat accumulation inside the electrical junction box, making efficient LED retrofits the safest choice for high-output needs.
Color temperature significantly influences how inviting or sterile a windowless hallway feels throughout the day. Light appearance measured between 2700K and 3000K produces a warm, welcoming glow that complements wood flooring and traditional trim work. Conversely, color temperatures above 4000K generate a cool, bluish cast that can make an enclosed corridor feel institutional or harsh. Aiming for 3000K strikes a practical balance, offering enough clarity for reading artwork while maintaining a cozy domestic atmosphere.
Color rendering index, commonly abbreviated as CRI, determines how accurately colors appear under artificial illumination. In a dark hallway adorned with family photographs or vibrant wall art, bulbs with a CRI rating of 90 or above preserve true-to-life tones without dulling finishes. Choosing dimmable LED bulbs also gives you the flexibility to adapt hallway brightness between active daytime hours and late-night movement. Always confirm that your chosen LED bulbs explicitly state dimmable compatibility on the packaging before pairing them with wall dimmer switches.
Integrating Layered Wall Sconces and Low-Level Accent Lighting
Relying exclusively on ceiling-mounted lighting often creates unflattering downward shadows that highlight ceiling imperfections while leaving vertical wall planes dark. Introducing wall sconces or wall mounted light fixtures provides eye-level illumination that softens overhead contrast and breaks up monotonic wall expanses. Mounting sconces between sixty and sixty-six inches above the finished floor places the glow within natural sightlines, making the corridor feel like an intentional gallery rather than a utility tunnel. Sconces equipped with upward and downward diffusers wash both the ceiling and baseboards simultaneously.
Low-level pathway illumination offers a discrete secondary layer that improves midnight safety without disturbing sleeping household members. Installing low-wattage step lights or motion-activated guide lights near baseboards illuminates footpaths without triggering high-lumen overhead arrays. LED strip lights tucked beneath chair rails or inside recessed baseboard reveals can also project a gentle wash across floorboards. These accent fixtures consume minimal electrical power while preventing nighttime stumbles in homes with young children or elderly residents.
Layered lighting schemes also allow homeowners to highlight architectural focal points at the terminus of a corridor. Positioning a directional spotlight or an adjustable accent fixture toward a painting or console table draws the eye forward, creating the illusion of greater depth. When visitors look down the hallway, their eyes naturally gravitate toward the illuminated end point rather than dwelling on the narrow corridor walls. This visual progression diminishes feelings of claustrophobia in older homes with exceptionally long, narrow hallway layouts.
Maximizing Light Bouncing with Mirrors, Paint Sheens, and Glass Doors
Hardware fixtures represent only half the battle when brightening dark interior pathways; reflective surfaces multiply every lumen produced by your bulbs. Placing a large framed mirror along a central corridor wall instantly doubles the perceived width of the space while bouncing light into neighboring rooms. Positioning a mirror directly opposite a doorway that receives natural sunlight pulls daytime brightness deep into the windowless corridor. Oval or rectangular mirrors with slender frames prevent visual clutter while maximizing reflective glass surface area.
Wall color and paint sheen directly dictate how effectively ambient light scatters across the hall. Flat and matte finishes absorb illumination, deadening the impact of your ceiling fixtures and leaving the space feeling flat. Selecting eggshell or satin finishes introduces a delicate luster that bounces rays without creating glaring reflections. Pairing warm white or soft greige wall tones that possess a Light Reflectance Value, or LRV, above sixty-five ensures that minimal lumen energy gets lost to surface absorption.
Interior doors flanking a hallway also offer opportunities to introduce indirect natural light from adjacent rooms. Replacing solid wooden doors with French glass panels or frosted glass lites allows sunlight from bright bedrooms or home offices to filter into the corridor during the day. Keeping interior transom windows above doorframes maintains structural charm while channeling spillover brightness across the ceiling plane. Even painting interior door leaves in crisp white semi-gloss enhances illumination bounce along both sides of the corridor.
Implementing Dimmers, Three-Way Switches, and Smart Sensors
Corridor lighting requirements shift dramatically between morning preparation, afternoon cleaning, and midnight trips to the kitchen. Installing compatible dimmer switches allows you to dial down high-output overhead lights to a gentle glow during evening hours. Standard toggle switches force you to choose between complete darkness and blinding glare, whereas modern dimmers provide tailored illumination levels for every time of day. When installing electronic dimmers with LED fixtures, verify that the dimmer switch is rated for LED loads to prevent annoying bulb hum or flickering.
Hallways with entrances at opposite ends require multi-location switching for convenience and basic safety. Three-way and four-way switch configurations let occupants turn lights on upon entering the passage and switch them off upon exiting without retracing their steps in the dark. If running new multi-conductor traveler wiring through finished drywall is impractical, battery-powered wireless remote switches or smart relay switches can establish three-way functionality without cutting drywall. These modern controls mount directly into standard wall plates, providing seamless aesthetic integration.
Smart motion sensors deliver hands-free convenience that is particularly useful when carrying laundry baskets or groceries down a hallway. Passive infrared sensors detect occupant movement and automatically energize fixtures, extinguishing them after a designated period of inactivity to conserve electricity. Many smart switches feature integrated ambient light sensors, preventing the fixtures from activating during bright daylight hours when natural spillover provides sufficient illumination. Setting motion timers to thirty seconds or one minute ensures lights never stay on unnecessarily in vacant passages.
Electrical Safety Preparations and Fixture Replacement Steps
Replacing an obsolete hallway light fixture is an achievable DIY task, provided you observe strict electrical safety standards. Always begin by shutting off electrical power to the lighting circuit at the main service breaker panel. Verify that the circuit is completely de-energized by placing a non-contact voltage tester against the wires inside the ceiling box before touching any connections. Never rely on the wall switch alone, as multi-way switch circuits can carry live electrical current even when the switch is positioned in the off position.
Inspect the existing electrical junction box to confirm it is securely fastened to structural framing and rated to hold the fixture’s weight. Many older hallway boxes were installed strictly for lightweight utility pull-chain lights and may require reinforcement before supporting modern steel fixtures. Connect the bare copper or green grounding conductor securely to the fixture ground screw and junction box ground pigtail to safeguard against potential electrical faults. Fasten the black hot wire to the fixture hot lead and the white neutral conductor to the fixture neutral lead using appropriately sized twist-on wire connectors.
Gently fold the insulated wires back inside the junction box, ensuring no conductor strands are pinched between the fixture canopy and the drywall ceiling. Fasten the mounting plate securely using the manufacturer-provided screws, checking that the fixture sits flush without wobbling. Install compatible E26 bulbs that adhere strictly to the fixture’s maximum wattage ratings, then restore circuit power at the service panel to verify operation. If your ceiling lacks an existing junction box or your wiring features aging knob-and-tube insulation, consult a licensed electrician to perform the installation safely.
Routine Maintenance and Cleaning for Optimal Corridor Light Output
Overhead hallway fixtures accumulate fine household dust and airborne lint far faster than fixtures located in open living areas. Open-frame metal fixtures provide the benefit of straightforward bulb replacements, but their exposed surfaces collect settled debris that gradually diminishes total lumen output. Wiping down the fixture frame and bulb glass every few months with a dry microfiber cloth restores full illumination clarity without scratching painted metal finishes. Always turn off the wall switch and allow bulbs to cool completely before performing any maintenance tasks.
Inspecting socket connections periodically prevents early bulb failures and nuisance flickering. When replacing an E26 bulb, look into the socket with a flashlight to verify that the brass center contact tab remains springy and free of corrosion or heat discoloration. Avoid over-tightening bulbs when screwing them into the socket, as excessive torque can flatten the contact tab and break the electrical connection. Using quality LED bulbs minimizes the frequency of ladder climbing, providing thousands of operational hours before replacement becomes necessary.
Achieving a bright, welcoming corridor ultimately depends on matching the right hardware to your home’s physical layout and everyday family habits. Balancing ceiling-mounted fixtures with reflective surfaces, warm color temperatures, and responsive controls transforms a dim passageway into a bright, cohesive home feature. Take time to assess your square footage, verify fixture clearances, and select efficient bulbs that provide reliable, glare-free illumination throughout the entire hallway.





Write Your Review
No reviews yet. Be the first to share your experience!