


Exterior accent lighting brings outdoor living spaces to life after sunset, highlighting architectural rooflines, deck railings, and garden borders. Learning how to install led lights outside requires more than simply sticking a ribbon of diodes against an exterior wall and plugging it into a standard outlet. Outdoor installations face constant exposure to driving rain, harsh sunlight, morning dew, and seasonal temperature swings that quickly degrade indoor-grade hardware. Choosing the proper ingress protection rating and planning a secure power path from the start ensures your outdoor illumination remains bright, colorful, and reliable throughout the entire year.
Modern exterior lighting setups often feature flexible RGB ribbons, intuitive app scheduling, and weather-resistant silicone jackets that simplify installation across diverse home surfaces. Whether you are setting up exterior led strip lights under patio eaves or lining backyard pathways with affordable LED lighting options, achieving lasting results depends heavily on meticulous surface preparation and mechanical fastening. Understanding how to shelter non-waterproof power adapters and manage wireless receivers will save hours of troubleshooting down the road. This comprehensive guide walks through each critical phase of the process, from initial layout planning to long-term weather sealing.

Pros
- Expansive 66ft combined length across two reels covers wide indoor spaces and exterior architectural features
- IP65 silicone-coated strip ribbon safely tolerates dust exposure and rainfall in covered outdoor locations
- 44-key IR remote enables quick brightness and color mode adjustments without requiring phone apps or wireless pairing
- Strong double-sided adhesive makes peel-and-stick installation straightforward on smooth, clean surfaces
Cons
- Power adapter and IR control module are completely non-waterproof and require indoor placement or protective exterior enclosures
- Infrared remote requires a direct line of sight to the receiver sensor to register inputs properly
- Silicone coating protects against rain, but the strip cannot be submerged in water or placed in standing puddles
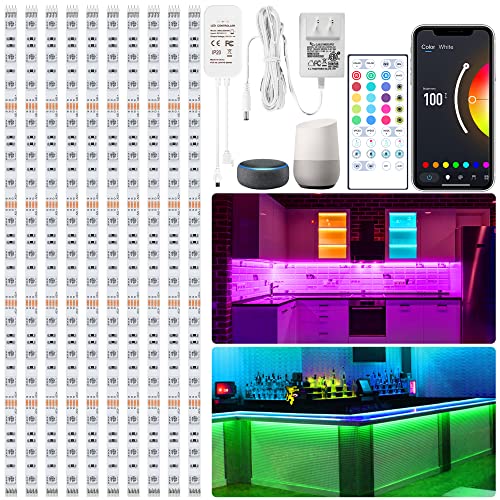
The DAYBETTER 66ft Waterproof LED Strip Light kit provides flexible decorative illumination divided into two 33-foot reels, making it well suited for larger indoor perimeters, entertainment setups, and exterior accents. This package appeals to homeowners, renters, patio hosts, and seasonal decorators seeking vivid color options across wide surface areas without the need for complex hardwired electrical installations.
Lighting performance centers on standard 5050 RGB LEDs capable of rendering multicolor effects and custom DIY blends across a listed spectrum of 16 million colors. Brightness is fully adjustable through the included 44-key infrared remote control, which also lets users cycle through dynamic scene modes. This range of adjustments allows the strips to serve equally well as subdued evening accent lighting behind living room furniture or as bright, high-energy illumination for holiday gatherings and parties.
Build quality on the ribbon itself features a transparent silicone coating that delivers an IP65 environmental rating. This layer seals the circuit board against dust ingress and protects the LED chips from direct rain exposure. However, water resistance is strictly limited to the strip itself. The manufacturer explicitly highlights that the connected control receiver box and wall power supply are non-waterproof, necessitating deliberate planning to keep electrical hardware sheltered from outdoor moisture.
Installation is designed for straightforward DIY setups using the integrated double-sided adhesive backing. Achieving a reliable hold requires thoroughly cleaning the target mounting surface to eliminate grease and dust before pressing the tape firmly into place. Because control is handled via an infrared receiver, users must route the wiring so the sensor remains visible to the handheld remote, avoiding thick obstructions that block the infrared beam.
The primary limitations of this lighting kit involve weatherproofing boundaries and control connectivity. Outdoor projects along patio rafters, rooflines, or decks require users to install third-party weatherproof outlet boxes or route the power plug indoors. Furthermore, the absence of smart wireless protocols like Wi-Fi or Bluetooth means operations are tied entirely to the physical 44-key remote rather than mobile apps or home automation hubs.
For buyers looking for an expansive, cost-effective accent lighting solution with immediate remote responsiveness, the DAYBETTER 66ft strip package offers solid decorative value. As long as users protect the vulnerable power components from wet conditions and maintain a clear line of sight for the remote, this kit delivers versatile, customizable color across extensive living and entertaining areas.
The DAYBETTER LED light strip features an IP65 silicone coating that shields the electrical components along the ribbon against dust intrusion and falling rain, making the strip itself viable for outdoor eaves, railings, patios, and porches. It provides clear light transmission while guarding against standard weather elements, though it is not designed to be submerged in water or installed where water accumulates.
A vital distinction for any outdoor installation is that only the LED tape carries the IP65 rating. The wall power supply and the inline IR receiver box are not waterproof. To ensure safe operation outdoors, the electrical plug and control box must either be situated inside a dry interior space or housed inside a weather-sealed electrical enclosure.
Management of the DAYBETTER strip lights is handled through an included 44-key infrared (IR) remote control. This unit governs power, brightness levels, primary color selection, and specialized DIY color-programming functions to tailor ambient room tones to personal preference.
Because the controller communicates using infrared light, reliable operation demands an unobstructed line of sight between the remote transmitter and the receiver sensor attached to the strip. Users should take this into account when dressing cables, ensuring the receiver is accessible to line-of-sight signals rather than completely hidden behind solid furniture or solid outdoor beams.
Mounting the DAYBETTER 66ft system is facilitated by pre-installed double-sided adhesive tape running along the backside of both 33-foot reels. The setup process is peel-and-stick, allowing rapid attachment along baseboards, bed frames, stair risers, kitchen islands, or deck perimeters.
To achieve durable tape adhesion, surfaces must be wiped clean of dirt, dust, and moisture prior to installation. Installers should lay out both rolls from the central power connection point to ensure balanced cable runs and confirm that the power lead comfortably reaches a standard indoor or protected outlet.

Pros
- IP68 waterproof rating ensures the strip light withstands rain, splashing, and outdoor moisture exposure.
- Dual control via push button and Bluetooth app provides quick access without needing a separate handheld remote.
- Built-in microphone delivers responsive audio-reactive lighting effects for gatherings and entertainment areas.
- Continuous 50-foot run easily accommodates large exterior perimeters, decks, and patio structures.
Cons
- Operates over local Bluetooth rather than Wi-Fi, which limits app adjustments to direct wireless range and precludes remote out-of-home control.
- Manufacturer does not specify exact lumen output, wattage consumption, or LED chip density.
- Peel-and-stick adhesive backing may require supplemental mounting hardware or exterior clips on rough or textured surfaces.
The KSIPZE 50ft Outdoor LED Strip Light is an exterior-rated multicolor RGB strip designed for decorative accent and ambient illumination. Stretching across a continuous 50-foot run, this system is well suited for homeowners, renters, and outdoor entertainers wanting to outline roof eaves, deck perimeters, balconies, gardens, or pool zones with customizable color displays.
In terms of lighting output, the multicolor RGB diodes deliver saturated hues, adjustable brightness levels, and preset dynamic transitions managed through the Bluetooth mobile app. An integrated microphone allows the strip to pulse and shift colors in sync with surrounding sound, making it a lively addition to backyard barbecues and holiday celebrations. Because the manufacturer does not list measured lumen ratings or color-rendering metrics, this strip is engineered primarily for atmospheric accent lighting rather than high-intensity architectural task illumination.
Exterior durability is anchored by an IP68 waterproof rating on the strip itself, designed to resist continuous moisture, heavy rainfall, and direct splashes around pools or garden fixtures. This sealed protective profile helps protect the internal components against year-round weather fluctuations. Buyers should keep in mind that while the strip light carries an IP68 waterproof rating, power connections and adapters should always be shielded in dry, weatherproof enclosures to maintain electrical safety.
Installation and daily operation remain accessible for first-time users. The product incorporates a peel-and-stick adhesive backing that secures onto clean, flat surfaces, while the flexible ribbon easily bends around corners and architectural contours. For control, users can toggle settings via the integrated physical button or pair their mobile device via Bluetooth to schedule on-and-off timers and customize color palettes.
While the local Bluetooth interface avoids the complexity of home Wi-Fi pairing, it does mean users must remain within local signal range to adjust settings, as remote out-of-home commands are not supported. Additionally, mounting the strip on textured surfaces such as masonry, brick, or unsealed wood may require supplemental exterior mounting clips. For shoppers seeking an affordable, weather-resistant 50-foot RGB accent light with sound reactivity and scheduled automation, the KSIPZE strip offers solid decorative utility.
Control is handled directly through a companion smartphone app via local Bluetooth or by using the integrated physical push button. The mobile app allows users to adjust RGB color spectrums, dim light levels, select preset lighting scenes, and program automated on-and-off schedules.
Because the connection utilizes Bluetooth rather than Wi-Fi, pairing is fast and does not require a dedicated smart-home hub or network configuration. The operational tradeoff is that control is limited to direct device range, meaning cloud-based remote control away from home and voice-assistant integrations are not supported.
The lighting ribbon features an IP68 waterproof designation, certifying that the strip is built to withstand rain, splashes, and ambient outdoor moisture when placed along patio railings, pool zones, rooflines, and garden beds.
Mounting is facilitated by an integrated adhesive backing designed for clean, dry, and flat surfaces. When installing on porous or rough outdoor materials such as stucco, raw lumber, or masonry, adding exterior mounting clips or zip ties is recommended to ensure long-term physical hold against temperature shifts and humidity.
Step-by-Step Guide to Exterior LED Light Installation
Installing exterior LED fixtures requires matching the fixture ingress protection with proper physical mounting and electrical safety. Exterior lighting strips transform patios, rooflines, and garden pathways, yet outdoor elements like rain, heat, and ultraviolet rays demand a structured setup process. Successful outdoor lighting projects rely on clean surface adhesion, secure mechanical fasteners, and complete isolation of electrical drivers from water intrusion. Taking time to map out power sources and cable pathways before peeling any adhesive backing ensures a clean look and long-term durability.
Understanding Weatherproofing and Ingress Protection Ratings
Water resistance determines where and how outdoor lighting can be mounted safely. Strips rated IP65, such as the DAYBETTER Waterproof LED Light Strips 66ft, feature a protective silicone coating over the diodes that blocks dust and resists direct rainfall or water splashes. These lights function well along porch ceilings, covered patios, and roof eaves where driving rain is intermittent. However, IP65 strips cannot withstand standing water or direct submersion, making them unsuitable for ground-level pooling zones or pool perimeters.
Strips carrying an IP68 rating, such as the KSIPZE 50ft Outdoor LED Strip Lights Waterproof, offer complete enclosure against continuous moisture, high humidity, and heavy downpours. The higher rating provides peace of mind when mounting lights near open garden beds, balcony edges, or pool surroundings where splashing occurs frequently. Even with an IP68 strip, the critical point of failure often lies at the cut ends or connection points rather than the sealed body. Knowing your product rating helps prevent water damage before you ever mount the first foot of tape.
A common oversight during planning is assuming the entire kit shares the same environmental rating. In most retail strip setups, only the flexible diode ribbon itself carries an IP65 or IP68 rating, while the attached power transformer and control module remain vulnerable to water. The DAYBETTER kit, for example, explicitly requires keeping the control box and power adapter sheltered in dry environments. Verifying which sections are truly weather-sealed dictates where components must be positioned relative to exterior wall outlets.
Power Supply Security and Weatherproof Enclosure Requirements
Exterior electrical safety begins at the outlet, which must be rated for outdoor use and equipped with Ground Fault Circuit Interrupter (GFCI) protection. Standard household exterior outlets feature spring-loaded door covers that snap shut when empty, but running continuous lighting requires an in-use weatherproof cover, often called a bubble cover. This transparent plastic housing encloses the bulky transformer block while allowing the low-voltage power cord to exit cleanly through the bottom gasket. Using an in-use cover prevents wind-driven rain from penetrating the electrical socket while the lights operate.
When an outlet lacks adequate cover depth for an oversized plug-in driver, mounting an external weatherproof electrical box provides a dedicated enclosure. These junction boxes feature sealed rubber grommets that accept input and output cables while maintaining an airtight interior. Placing the controller, wireless receiver, and transformer inside an exterior-rated enclosure protects delicate circuitry from humidity buildup and direct condensation. Keeping electronic adapters off bare ground also guards them against pooling water during heavy storms.
Cable routing from the power source to the start of the LED strip demands careful consideration of physical pinch points. Low-voltage cords should run along wall edges, under siding trim, or inside protective conduit rather than hanging freely across high-traffic zones. Free-hanging wires invite physical snagging from pets, children, or garden equipment, which strains electrical solder points. Securing all excess power cabling with UV-resistant nylon cable clips preserves connection integrity and keeps the installation neat.
Surface Cleaning and Exterior Adhesion Preparation
Strong adhesion on outdoor surfaces requires thorough cleaning to eliminate environmental film, dust, pollen, and natural oils. Outdoor building materials like painted wood, vinyl siding, aluminum fascia, and composite deck railings collect microscopic grime that prevents pressure-sensitive adhesive from bonding properly. Applying strip lights directly to dirty or chalky surfaces almost always causes peeling within a few days. Proper preparation creates an ideal bonding surface that withstands seasonal temperature shifts.
Start by wiping the intended installation path with a mild household detergent mixed with warm water to remove grease, dirt, and loose debris. Follow this initial wash with an isopropyl alcohol wipe, using at least a seventy percent concentration to strip away remaining chemical films without leaving behind residue. Allow the surface to dry completely before attempting to attach any adhesive materials. Trapped moisture under adhesive backing ruins bonding tack and creates pockets where mold or mildew can accumulate behind the ribbon.
Ambient temperature during installation plays a major role in how well self-adhesive backings activate and cure. Pressure-sensitive adhesive tape bonds best when ambient and surface temperatures sit between sixty and eighty degrees Fahrenheit. Installing tape in cold weather makes the adhesive brittle, resulting in weak initial contact that fails when winds pick up. If you must install in cooler weather, gently warming the mounting surface with a household hair dryer can soften the adhesive for improved bonding.
Measuring Runs, Handling Corners, and Avoiding Copper Trace Damage
Accurate measurements prevent frustrating mid-project adjustments and ensure your lighting run reaches the intended endpoint without excessive tension. Measure the entire installation path with a flexible measuring tape, taking into account vertical drops from rooflines or railing posts to the power outlet. Both the DAYBETTER 66-foot set and the KSIPZE 50-foot run provide substantial coverage, but stretching flexible ribbons tight to make up for short measurements damages internal copper circuitry. Always allow a few inches of slack near corners and connection terminals to relieve mechanical stress.
Turning corners requires gentle handling because flexible printed circuit boards cannot make sharp ninety-degree right angles without creasing. Bending a flexible strip sharply folds the thin copper traces running beneath the silicone, leading to dead sections or color mismatching along the line. To negotiate corners cleanly, form a gentle loop or arc with the ribbon rather than pressing it flat into the seam. Alternatively, specialized outdoor corner connectors or jumper cables can bridge separate strip segments without bending the flexible ribbon itself.
If your installation layout requires shortening the strip, cut only across designated cutting marks indicated by copper solder pads and scissor icons. Cutting through silicone at arbitrary locations severs internal circuit loops, permanently disabling every diode downstream of that point. After making an authorized cut, immediately cap the exposed end with neutral-cure exterior silicone adhesive or a sealed end cap. Leaving copper contacts exposed outdoors invites rapid oxidation from morning dew and eventual short-circuiting.
Securing the Run: Adhesives, Mounting Clips, and Channels
Adhesive tape included on strip ribbons provides initial placement, but exterior weather conditions require mechanical reinforcement for lasting stability. Solar heat softens standard acrylic adhesives during summer afternoons, while winter freezes cause backing materials to contract and release from siding. Relying solely on tape backing along vertical walls, patio joists, or soffits frequently results in sagging runs. Augmenting the factory tape with dedicated mechanical fasteners guarantees the lights stay firmly in position year-round.
Mounting clips made of clear silicone or UV-stabilized plastic provide durable mechanical support without obstructing light output. Fasten these clips using stainless steel screws spaced every twelve to eighteen inches along the run, placing additional clips near corners and connectors where tension is greatest. Stainless steel screws resist outdoor rusting, ensuring that moisture will not corrode fastener heads over time. For renters or surfaces where drilling is prohibited, outdoor-rated mounting squares with heavy-duty weather-resistant adhesive offer a viable screw-free alternative.
Aluminum mounting channels fitted with milky diffusers offer the most professional and durable installation method for exterior projects. Aluminum channels protect the flexible ribbon from direct UV degradation, bird strikes, and wind buffeting while acting as a passive heat sink that dissipates diode warmth. The frosted diffuser cover blends individual LED hotspots into a smooth, continuous neon-like glow along rooflines and patio beams. Channels mount cleanly to wood or masonry using clip brackets, allowing the entire lighting assembly to snap firmly into place.
Connecting Controllers and Optimizing Wireless Reception
Control systems dictate where and how the input signal receiver should be mounted relative to your living space. The DAYBETTER kit relies on a 44-key infrared (IR) remote, which requires an unobstructed line of sight between the handheld transmitter and the sensor eye. If the small receiver bulb is tucked behind a wooden fascia board or inside a solid plastic enclosure, the remote will fail to communicate. Fasten the infrared sensor where it faces your primary patio seating or doorway, while keeping the main wiring junction shielded from rain.
Smart app-enabled models like the KSIPZE strip utilize Bluetooth connectivity, eliminating the strict line-of-sight requirement needed by infrared systems. Bluetooth communication penetrates exterior walls and glass doors easily, letting you adjust color schemes, activate timers, or engage music sync modes from inside the house. When installing Bluetooth controllers, keep the unit within practical wireless range of your primary living area and away from dense metal structural framing that can attenuate signal strength. Setting up automated timers within the companion smartphone app ensures lights illuminate your exterior grounds automatically at dusk without manual intervention.
Managing receiver placement also affects operational modes like ambient music synchronization. When relying on an integrated microphone to sync lighting pulses with patio music, keep the controller near your outdoor audio source. Placing the control unit directly adjacent to noisy air conditioning compressors or pool pumps can trigger false sound inputs, causing erratic flashing patterns. Positioning the control box thoughtfully ensures smooth transitions, whether you prefer solid ambient warm tones for dining or dynamic color shifts for weekend entertaining.
Post-Installation Testing, Waterproof Sealing, and Upkeep
Conducting an initial electrical test before finalizing clips or channel covers saves substantial time and effort. Plug the power adapter into your GFCI outlet once the strip is temporarily positioned, cycling through red, green, blue, and white spectrums to verify diode uniformity. Checking brightness levels and color accuracy across the entire length catches loose pin connectors or damaged solder traces before you secure everything permanently. Discovering a faulty connection after driving dozens of mounting screws creates unnecessary rework.
Once the electrical test confirms flawless operation, seal every potential water entry point using clear silicone sealant. Apply a generous bead of exterior-grade neutral-cure silicone around connector junctions, power cord entry points, and end caps. Avoid standard acidic silicone sealants, as the acetic acid released during curing can corrode delicate copper traces and solder pads. Allow the sealant to cure fully according to manufacturer instructions before exposing the setup to rain or heavy moisture.
Routine inspection and maintenance preserve lighting brightness and protect your investment against premature wear. Periodically inspect the strip path for sagging sections, loose clips, or debris accumulation such as fallen leaves, pine needles, or spiderwebs. For tips on maintaining surface clarity without scratching silicone coatings, our cleaning and maintaining exterior LED strips guide covers safe wipe-down techniques and protective practices. Keeping the protective outer jacket clean ensures optimal lumen transmission and prevents dirt buildup from trapping unwanted heat against the circuit board. If you enjoy creative holiday decorating, exploring seasonal decorative lighting setups can give you additional ideas for integrating accent lighting across your architecture.
Properly installed exterior LED lighting delivers years of dependable illumination while withstanding rain, wind, and temperature fluctuations. Taking time to protect electrical drivers, clean mounting surfaces meticulously, and secure runs with mechanical clips creates a clean, durable installation. Following these structured steps lets you enjoy vibrant patio ambiance, enhanced architectural lines, and dependable outdoor illumination season after season.




Write Your Review
No reviews yet. Be the first to share your experience!