


A cracked rear light lens, flickering brake bulb, or water-damaged housing is more than an aesthetic nuisance on the road. It creates serious safety hazards and invites expensive traffic citations during daily commutes. Learning how to replace a rear tail light assembly allows vehicle owners to restore nighttime visibility, prevent moisture damage to vehicle electronics, and avoid high labor charges at repair shops. Proper installation requires understanding how automotive lenses mount to the body, how wiring harnesses lock, and how weatherproof seals function.
Modern vehicle designs differ significantly across pickup trucks, sport utility vehicles, and passenger sedans. Sourcing the right replacement housing from reliable manufacturers like WFLNHB, MiKaFex, or UnayKolb ensures that alignment pins, clip locations, and electrical plugs match factory specifications. Before turning a single bolt, preparing the vehicle and workspace with reliable commercial overhead lighting fixtures ensures every hidden fastener and clip remains visible. Taking a methodical approach guarantees a clean fit and leak-free operation for miles ahead.
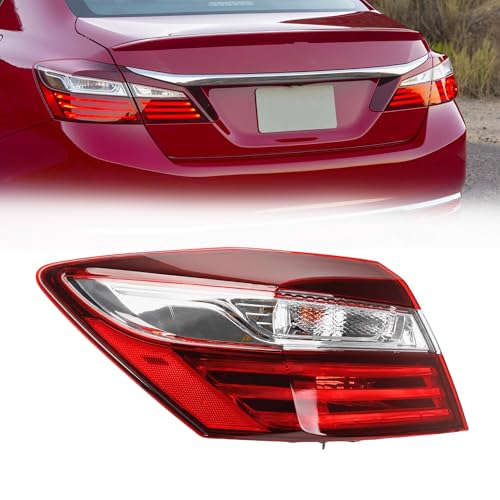


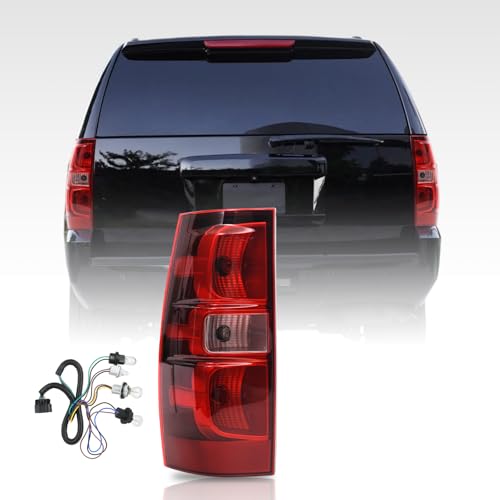


Essential Steps for Replacing a Vehicle Rear Tail Light Assembly
Replacing a damaged or non-functioning rear lighting housing is one of the most practical and cost-effective maintenance tasks a vehicle owner can undertake at home. Modern automotive exteriors rely on modular assemblies that combine turn indicators, brake lamps, running lights, and reverse illumination into a single unified casing. While removing exterior vehicle trim can initially seem intimidating, modern tail units are engineered for straightforward servicing using standard hand tools. By understanding the mechanical fastening methods, electrical connector locks, and perimeter weather seals, you can perform a clean replacement that restores complete driving safety and protects your vehicle electrical system from road grime.
Essential Tools and Safety Preparations Before Starting
Gathering the proper hand tools before opening the vehicle trunk or lowering the tailgate prevents frustrating delays and eliminates the risk of scratching exterior clear coats. Most automotive light assemblies require a compact ratchet paired with eight-millimeter, ten-millimeter, or twelve-millimeter sockets, along with standard Phillips and Torx bits. A dedicated nylon trim removal lever is far superior to a metal screwdriver because plastic tools will not chip painted body edges or mar delicate plastic lens surrounds. Equipping yourself with nitrile work gloves and safety glasses keeps road grime, sharp sheet metal edges, and cracked lens shards from causing injury during component removal.
Securing the vehicle electrical system is an indispensable preliminary step that protects sensitive computer modules and vehicle wiring from unexpected voltage surges. Park the automobile on a level concrete driveway or garage bay, set the emergency brake firmly, and switch off the ignition completely before opening any service panels. Disconnecting the negative cable from the twelve-volt vehicle battery prevents accidental short circuits while unlatching automotive harnesses or testing electrical terminals. When organizing loose fasteners and replacement housings, staging the workspace with reliable workspace utility fixtures ensures that dropped screws and micro clips remain easily visible on the floor.
Identifying Mounting Hardware: Screws, Bolts, and Retainer Clips
Automotive designers utilize diverse fastening strategies depending on the chassis configuration, bed style, and body style of the vehicle. Pickup trucks like late-model Ram configurations often position visible mounting bolts directly inside the rear tailgate jamb, making mechanical access quick once the gate is lowered. Crossover sport utility vehicles and passenger sedans frequently enclose mounting nuts behind interior trunk carpeting, requiring you to pop out plastic push-clips to reach the inner quarter panel cavity. Locating every designated attachment point before applying pulling force ensures that structural mounting bosses are not stressed or snapped during service.
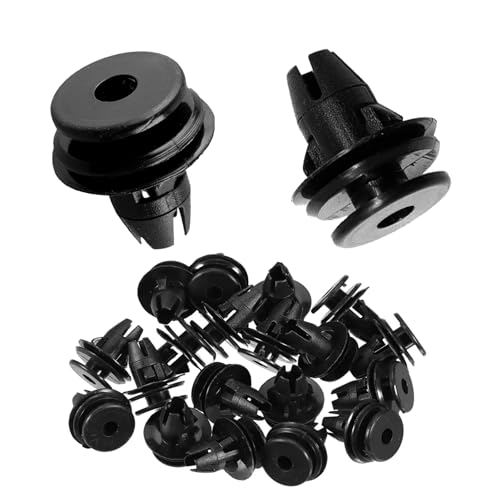
In addition to threaded metal hardware, almost every modern vehicle relies on friction pins and plastic retainer clips to pull the exterior lens flush against the quarter panel. Components such as the 20PCS Tail Lights Retainer Clips provide the firm snap engagement required to anchor alignment studs securely inside sheet metal body holes. These nylon or plastic retainers naturally turn brittle after years of exposure to engine exhaust heat, road salts, and extreme seasonal temperature swings. Inspecting the condition of these clips before reassembly allows you to substitute worn fasteners, preventing annoying vibrations and aerodynamic whistling at highway speeds.
Step-by-Step Removal of the Old Tail Light Housing
Loosen and extract each threaded fastener using your hand ratchet and the correct socket size, turning counterclockwise with controlled pressure. Place every extracted bolt, nut, and washer into a labeled magnetic parts tray so factory hardware remains organized throughout the procedure. Once all threaded fasteners are fully detached, the light assembly will remain held in place by its internal guide studs and locking clips. Never yank the housing violently outward at an awkward angle, as asymmetrical force can snap molded plastic alignment pins off the rear casing.
Apply firm, steady backward pressure parallel to the vehicle body lines to dislodge the remaining retention studs from their rubber grommets. If road grime or aged sealant causes the lens to resist movement, gently wedge a wide nylon trim tool between the housing edge and sheet metal to provide even leverage. You will feel the guide studs pop free from the vehicle body receptively once sufficient straight pressure is applied. Support the free housing securely in your hands so it does not drop against the bumper fascia and strain the attached electrical wiring.
Disconnecting and Inspecting the Electrical Wiring Harness
Every automotive tail lamp assembly receives electrical current through either a centralized multi-pin harness connector or individual twist-lock bulb sockets. Locate the central locking tab on the plastic connector body and depress the retention lever firmly using your thumb pad. Pull the male and female connector shells straight apart without tugging on the individual colored insulated wires, which can loosen terminal crimps inside the connector plug. If accumulated dirt or grit jams the locking latch, apply a quick blast of specialized electronic cleaner to free up the mechanism before pulling.
Examine the exposed electrical terminal pins on both sides of the disconnected plug for signs of copper corrosion, dark discoloration, or heat damage. Corroded terminals create high electrical resistance that manifests as dim brake lamps, intermittent flickering, or dashboard bulb-out warning indicators. If you discover powdery oxidation or road dust on the metal pins, gently brush the contacts clean with a stiff nylon detailing brush. Coating the clean mating pins with a thin layer of non-conductive dielectric grease seals out future moisture intrusions and prevents road spray oxidation.
Comparing Replacement Assemblies and Vehicle Fitment Nuances
Placing your new replacement unit side by side with the original factory part on a clean workbench is a vital step before installation. Even vehicles sharing the identical model platform often feature subtle trim variations, wiring pinout differences, or distinct lens colorings between trim packages. For instance, a dedicated driver-side part such as the BOGYL Halogen Tail Light Left for Chevy Traverse features body contours and mounting stud locations engineered exclusively for the left flank of the vehicle. Confirming that the mounting studs, harness receptacles, and overall outer dimensions align identically avoids wasted effort during mounting.
Identify whether your replacement assembly arrives fully populated with light bulbs and integrated wiring harnesses or requires transferring your original components. Units like the Tektend Tail Light Assembly Compatible driver-side replacement often include pre-installed bulbs and harnesses for a true plug-and-play process. Conversely, options like the Right Tail Light Assembly Compatible With Toyota or the WFLNHB Rear Tail Light Replacement for Ram 1500 may require rotating existing bulb sockets counterclockwise to transfer them into the new shell. Taking a moment to verify bulb compatibility and socket orientation guarantees seamless electrical performance once mounted.
Installing the New Assembly and Sealing Against Moisture
Moisture intrusion remains the most frequent reason aftermarket and replacement automotive lighting housings develop internal condensation and premature electrical failures. Carefully inspect the dense closed-cell foam or rubber weatherstrip gasket mounted around the perimeter of the new housing before mounting. Ensure this gasket adheres smoothly against its channel without any pinches, tears, or curled edges that could permit rain runoff or car wash jets to infiltrate the trunk cavity. A clean, uniform gasket seal prevents interior lens fogging and safeguards sensitive lamp sockets from water damage.
Achieving spotless component alignment requires bright, even garage illumination, mirroring the careful visual standards needed when operating modular lighting setups where minor structural inconsistencies must be caught early. Reconnect the primary electrical harness plug firmly until the integrated retention clip engages with an audible, tactile click. Carefully guide the wiring pigtail into its designated body recess so the wires do not become compressed between the vehicle chassis and the plastic housing during final insertion.
Aligning Guide Studs and Reattaching Fasteners
Line up the rear guide pins and ball studs of the new tail assembly with the corresponding body grommets and sheet metal openings. Press the housing squarely forward into the vehicle body using broad, even pressure from the palms of your hands until you feel the alignment pins seat. When servicing models like the UnayKolb Rear Left Tail Light Assembly Compatible with Subaru Forester, observe the reveal gap around the entire quarter panel to ensure the lens sits perfectly flush. Proper panel alignment preserves aerodynamic efficiency, prevents wind buffeting, and ensures uniform exterior body lines.
Thread all factory mounting screws, nuts, or retaining bolts into their respective mounting holes by hand for several turns before reaching for your ratchet. Hand-starting hardware prevents accidental cross-threading into stamped steel speed clips or threaded plastic inserts. Tighten the fasteners gradually in an alternating crisscross pattern so that the perimeter rubber gasket compresses evenly against the sheet metal. Avoid utilizing pneumatic power tools or heavy impact wrenches, as excessive clamping torque will crack the brittle plastic mounting flanges of the new housing.
Thorough Function Testing and Bulb Verification
Conducting a complete electrical test before reassembling interior trunk liners or tailgate trim covers saves valuable time if a socket needs adjustment. Reconnect the negative twelve-volt battery cable and turn the vehicle ignition key to the run or auxiliary position. Methodically test every individual lighting circuit: turn on parking lamps, depress the brake pedal, engage left and right turn indicators, and shift into reverse gear while a helper observes the rear lens. If completing the job solo, position the vehicle facing away from a garage door or large window to monitor lighting reflections via your rear mirrors.
Specialized vehicle models like the Dasbecan Driver Side Tail Light Compatible with Honda Accord or the MiKaFex Right Tail Light Assembly Compatible with Chevy Traverse integrate multi-chambered internal lighting arrays. Verify that the running light element illuminates at standard intensity and brightens substantially whenever the brake pedal is depressed. Observe the flash rate of the turn indicator; if the lamp flashes twice as fast as normal, verify that the bulb filament is undamaged and the socket contacts are making solid physical contact.
Troubleshooting Common Post-Installation Lighting Glitches
If a newly installed rear lamp housing does not illuminate during functional testing, approach the issue methodically starting at the electrical supply points. Unplug the main harness connector and inspect the internal metal pins to ensure none were bent sideways or pushed out of the connector body during insertion. Consult your vehicle owner manual fuse index to locate the specific fuse responsible for the rear running lamps or stop lamps. A blown fuse often indicates that a live wire contacted bare chassis ground during the swap, requiring a fresh fuse of matching amperage rating.
Light condensation appearing inside the clear plastic lens shortly after installation usually stems from an improperly seated bulb socket or a pinched perimeter gasket. Remove the assembly and verify that every twist-lock socket has its rubber O-ring fully seated against the housing port. If internal humidity has entered the casing, warm the housing gently using a handheld hair dryer set to low heat directed through the largest bulb port until all vapor evaporates. Once thoroughly dry, reinstall the sockets firmly with a quarter-turn rotation to restore an airtight weather seal.
Practical Care and Maintenance for Extended Housing Life
Maintaining your new tail light assembly ensures bright optical clarity, protects housing plastics from premature hazing, and prolongs internal bulb life. Wash the exterior plastic lens using pH-neutral automotive car wash soap and a plush microfiber wash mitt rather than abrasive scouring pads or harsh industrial solvents. Harsh chemicals and petroleum-based degreasers strip the factory ultraviolet protective clear coat, accelerating plastic yellowing and surface micro-cracking from solar exposure. Applying a high-grade synthetic polymer sealant or automotive ceramic coating to the lens twice a year repels environmental fallout, road tar, and harmful ultraviolet rays.
Periodically inspect the rear housing assembly during seasonal tire rotations or oil change intervals to confirm that mounting fasteners remain snug against body grommets. Road vibrations and thermal expansion can gradually loosen mounting bolts, potentially compromising the weatherstrip compression seal over extended mileage. Addressing minor condensation promptly and keeping the exterior lens clean preserves your vehicle visibility in heavy rain and dense fog. Completing this installation yourself ensures reliable lighting performance while maintaining high safety standards across every driving journey.




Write Your Review
No reviews yet. Be the first to share your experience!