


Creating a durable, salon-level manicure at home often comes down to precise placement and proper photopolymerization. Traditional nail polish chips easily, while liquid salon gel requires significant technique and extensive cleanup. Semi-cured gel strips solve this issue by offering flexible, partially hardened lacquer that hardens fully under ultraviolet illumination. Understanding how to apply gel stickers with uv lamp technology allows you to achieve smooth edges, high shine, and chip-resistant wear without damaging your natural nail beds. Pairing your curing setup with proper task lighting for fine detail work ensures that every strip aligns cleanly along the cuticle perimeter before you initiate the light cycle.
The entire process bridges the gap between simple press-on adhesives and professional salon curing. Unlike standard sticker wraps, semi-cured formulas contain active photoinitiators that bond and harden under targeted wavelengths. Achieving a long-lasting manicure requires thorough nail preparation, tight edge compression with a wooden manicure stick, and accurate exposure under compatible light-emitting diodes. Whether you use a compact handheld wand or a multi-diode desktop dryer, balancing placement technique with correct timing prevents lifting, snagging, and premature peeling.


Mastering Gel Nail Sticker Application and UV Curing
Achieving a durable manicure with semi-cured wraps requires both mechanical precision and controlled light exposure. When you know how to apply gel stickers with uv lamp technology correctly, the flexible strips transform into a tough, glossy coating that resists everyday wear. The process relies on photopolymerization, where specific light wavelengths convert liquid oligomers into a rigid solid structure. Following a structured application workflow ensures that each wrap adheres smoothly without premature lifting or edge snagging.
Understanding Semi-Cured Gel Chemistry and Light Polymerization
Semi-cured gel nail strips represent an intermediate manufacturing state between liquid polish and hard salon gel. Products such as AutyaMee and DUKASOU are pre-cured to roughly 60 percent during production to keep the material supple and elastic. This partial cure allows the wraps to stretch gently over different nail contours while maintaining consistent thickness. Once exposed to ultraviolet or light-emitting diode rays, the remaining photoinitiators activate and complete the chemical cross-linking process.
Traditional vinyl nail wraps depend entirely on pressure-sensitive adhesives that can peel when exposed to warm water or household detergents. In contrast, semi-cured strips fuse into a hardened protective shell that locks against the nail plate. The final polymerized layer exhibits the same gloss, scratch resistance, and structural stability found in professional salon manicures. Understanding this chemical transition highlights why adequate light intensity and complete curing cycles are essential for long-term retention.
Preparing Natural Nails for Long-Lasting Adhesion
Adhesion failures almost always stem from inadequate surface preparation rather than defective adhesive layers. Natural nail plates continuously produce sebum and moisture, creating a slick barrier that prevents the gel polymer from bonding securely. Washing your hands thoroughly with grease-cutting soap and drying them completely removes initial surface oils. Following this wash with the isopropyl alcohol prep pads supplied in kits removes microscopic residues and dehydrates the nail plate temporarily.
Cuticle management is equally vital because gel material cannot form a durable seal over living skin or dead pterygium tissue. Using the flat or beveled edge of a wooden manicure stick, gently push the eponychium and surrounding cuticles backward toward the nail fold. Clearing any invisible tissue clinging to the nail base prevents the wrap from lifting as the nail grows out. Both AutyaMee and DUKASOU designs eliminate the need for aggressive surface buffing, preserving natural nail thickness while ensuring dependable grip.
Workspace Lighting and Station Setup
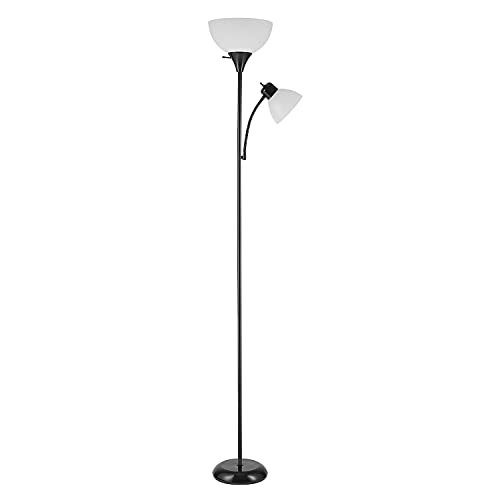
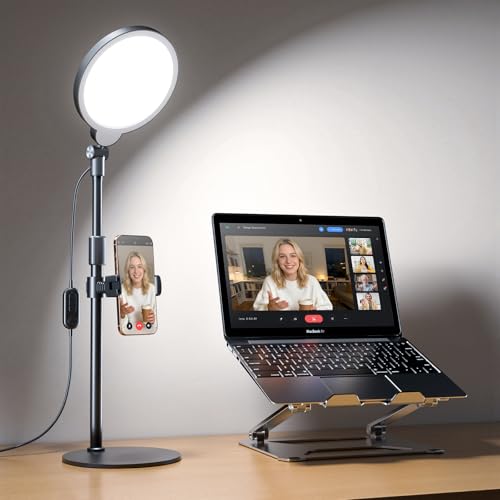
Setting up a clean workspace with clear visibility prevents alignment errors before the curing cycle begins. Working beneath focused desk illumination allows you to identify subtle cuticle margins, side wall boundaries, and microscopic air pockets under each strip. Position your task light so it casts balanced, shadow-free illumination across your fingertips without shining directly into your eyes. Clear away any loose dust, files, or liquid removers to maintain an organized, lint-free surface.
Ambient light control is a critical consideration when handling light-sensitive polymer strips. Natural daylight from nearby windows and scattered beams from strong desktop lamps contain trace ultraviolet rays that can inadvertently harden exposed wraps. Keep your curing lamp positioned slightly away from your unapplied sticker sheet to prevent accidental curing on the plastic backing. Keeping the black light-blocking storage bag within reach ensures you can shelter unused wraps immediately after selecting your required sizes.
Selecting the Correct Strip Dimensions for Each Nail
Selecting the appropriate wrap size for each finger directly influences how long the application remains secure. As a universal rule, choose a strip that is slightly narrower than your natural nail plate rather than one that overlaps your side walls. An oversized wrap that touches surrounding skin or cuticle tissue will inevitably break its vacuum seal and lift within days. A small gap of roughly half a millimeter around the perimeter ensures the gel bonds exclusively to clean keratin.
Modern gel strip sets offer generous sizing variety to accommodate different nail bed widths and lengths. DUKASOU packages provide 28 stickers across 14 distinct dimensions, while AutyaMee sets include 20 strips in 10 tailored sizes. Hold the transparent sheet directly over your bare nail to visually gauge the curve and width before peeling any adhesive backing. If you find yourself between two sizes, opt for the smaller option because the flexible polymer allows for slight stretching during placement.
Application Technique: Placement, Stretching, and Smoothing
Carefully peel the clear protective top film from the selected sticker before lifting the gel wrap from its backing sheet. Align the rounded bottom edge of the strip directly above your cuticle line, making sure it sits on the nail plate without touching the skin. Lower the center of the strip onto the nail and press firmly from the cuticle toward the free edge using your thumb pad. Once the center line is secured, smooth the material outward toward the lateral nail folds in smooth, rolling motions.
Eliminating trapped air bubbles during this initial smoothing phase is essential for preventing premature separation. The flexible 60 percent pre-cured structure allows you to gently stretch the wrap horizontally if you need minor width adjustments. Avoid pulling too aggressively, as excessive tension can cause the material to rebound and thin out at the tip. Work methodically from the center out to create uniform contact across the entire natural nail plate.
Edge Sealing and Removing Excess Film
Sealing the edges represents the most critical mechanical step prior to light exposure. Take the beveled wooden stick included with your kit and firmly trace the entire perimeter of the nail plate. Apply concentrated downward pressure along the cuticle line and side walls to flatten the wrap flush against the nail surface. This firm pressing bevels the gel edge, creating a tapered seal that prevents hair and clothing fibers from catching beneath the strip later.
Once the edges are completely flat, trim the excess length extending past your natural free edge. Use a small pair of nail scissors or clippers to snip away the bulk of the overhang, leaving approximately one to two millimeters of material. Fold this remaining tip gently downward over the free edge of your nail instead of filing it off immediately. Leaving this slight buffer prevents the tip from shrinking backward away from the nail edge during the photopolymerization reaction.
UV and LED Lamp Curing Times and Exposure Methods
Exposing the pre-shaped gel strips to targeted light initiates the chemical reaction that hardens the polymer. Standard curing durations vary slightly depending on strip thickness and lamp output, but 60 seconds is the baseline recommendation for sets like DUKASOU. The compact ohora Care LED lamp provides programmed dual timers of 45 seconds and 60 seconds, offering customizable exposure for different gel densities. If the strips still feel slightly pliable after one cycle, running a second 60-second cycle ensures thorough polymerization without damaging natural nails.
The spectral output of your light fixture plays a major role in how evenly the photoinitiators react. The SUNUV SUNone nail dryer utilizes 30 high-power light-emitting diodes that emit both 365 nm ultraviolet and 405 nm LED wavelengths. This dual-wavelength delivery ensures that clear bases, white French tips, and opaque color pigments cure completely from top surface to adhesive base. Desktop lamps with wide light distribution cure all four fingers simultaneously while maintaining consistent radiant flux across every fingertip.
Handheld spot lights offer an alternative method for curing individual nails with focused precision. Portable units like the GAOY Handheld UV Light feature built-in dual timers with a short press for 20 seconds and a long press for 60 seconds. These battery-powered wands allow you to flash-cure each nail immediately after smoothing, locking the edges in place before moving to the next finger. The GAOY model with an integrated stand and LCD screen provides hands-free convenience, displaying battery levels and curing seconds clearly.
Cooling Down and Final Shaping with the Nail File
Allowing the cured gel material to cool and stabilize before mechanical filing is a frequently overlooked step. DUKASOU guidelines explicitly recommend waiting approximately 20 seconds after the light cycle ends before touching or shaping the tips. Freshly cured polymers remain slightly warm from the exothermic reaction and retain microscopic elasticity while cooling down. Giving the material a brief resting period ensures that the gel achieves maximum hardness before it encounters friction from the nail file.
Final shaping must be executed with careful filing mechanics to avoid separating the hardened wrap from the free edge. Hold the included fine-grit nail file perpendicular to your fingertip at a strict 90-degree angle. File in one steady downward direction across the tip rather than sawing vigorously back and forth. Downward unidirectional filing cleanly slices away the excess overhang while beveling the leading edge, leaving a smooth, salon-finished contour that will not snag.
Comparing Portable Handheld Lights and Desktop Curing Lamps
Choosing between a portable handheld light and a full-sized desktop lamp depends on your workspace and application habits. Handheld cordless models, such as the GAOY wand with up to 40 minutes of continuous runtime, provide exceptional mobility and spot-curing control. Their focused optical lenses deliver targeted beam intensity directly over a single nail, which helps secure French tips or intricate art wraps without moving your hand. These compact devices slip easily into travel bags, making on-the-go touchups fast and straightforward.
Desktop lamps provide greater overall power and convenience when performing full ten-finger manicures. Models like the SUNUV SUNone feature an infrared auto-sensor that turns the light on automatically when you insert your hand, eliminating button presses. A removable reflective base plate makes desktop models easy to sanitize and allows comfortable positioning for pedicure applications. Meanwhile, folding six-watt options like the ohora Care lamp balance desktop stability with compact travel dimensions, resting flat on folding legs over your fingers.
Troubleshooting Edge Lifting, Wrinkling, and Incomplete Curing
If your cured strips feel sticky, soft, or dull after a complete cycle, inadequate light delivery is the primary culprit. Battery-operated wands running low on charge may emit lower radiant flux, requiring an extended or repeated exposure cycle. Ensure your fingers sit directly beneath the active diodes rather than lingering in peripheral shadows near the lamp opening. If a tacky inhibition layer persists on certain high-gloss top layers, gently wipe the surface with an alcohol prep pad to restore clarity.
Hair snagging along the cuticle edge usually indicates that the strip was applied slightly over the eponychium skin fold. When skin cells shed naturally, the bond between the gel and the cuticle breaks, leaving an exposed lip that catches fine strands. To prevent this, always leave a small hairline gap of bare nail plate between the wrap and the skin during placement. Furthermore, spend additional time beveling the perimeter with your wooden stick before curing to guarantee a flush transition.
Uneven curing on thumb nails occurs when hands are placed flat inside a desktop lamp with the thumb tilted at an awkward angle. Because thumbs rest sideways naturally, the top surface often points away from overhead diodes, receiving insufficient direct energy. To resolve this issue, always cure your four fingers together first, and then cure both thumbs together while resting them completely flat under the center diodes. This separate thumb cycle ensures uniform light absorption across the entire curved surface.
Safe Removal Practices to Protect Natural Nail Health
Removing semi-cured gel strips safely is essential for maintaining natural keratin strength and avoiding surface peeling. Unlike traditional acrylics or hard gel extensions, UV-cured nail stickers do not require harsh mechanical filing or aggressive scraping to remove. Apply a few drops of nourishing cuticle oil or gentle acetone around the perimeter of each cured strip to soften the adhesive layer. Allow the liquid to penetrate beneath the edges for one to two minutes before attempting removal.
Take the beveled tip of the wooden manicure stick and gently nudge the outer edge of the strip near the cuticle. As the bond loosens, slowly glide the wooden stick flat beneath the wrap, working gently from the side toward the center. Never force or rip a stubborn wrap away from a dry nail plate, as doing so can lift delicate dorsal nail cells. With patient, oil-assisted removal, your natural nails will remain smooth, healthy, and ready for your next manicure design.
Storage Rules to Preserve Remaining Semi-Cured Strips
Unused gel strips remain sensitive to ambient light and environmental temperature until they are formally cured. Leaving the transparent carrier sheet exposed on a vanity or near an active window will cause residual photoinitiators to react, making the remaining wraps stiff and unusable. As soon as you finish selecting and cutting your required sizes, return all leftover strips into their original black light-blocking pouch.
Seal the protective pouch tightly using the included adhesive sealing strip to prevent air exposure and moisture loss. Store the sealed package in a cool, dark drawer away from direct sunlight, central heating vents, and high-humidity bathrooms. Proper storage keeps the 60 percent pre-cured polymer soft, flexible, and fully reactive for future manicures weeks or months later. Taking a few seconds to protect your remaining inventory ensures that every set delivers reliable value and salon-grade performance.
Practical Takeaways for Long-Lasting Application
Mastering this modern manicure technique relies on balancing meticulous prep, precise edge sealing, and disciplined light exposure. Cleaning natural nail oils, choosing slightly narrower strip sizes, and firmly beveling side walls create the foundation for two weeks of durable wear. Pairing those physical habits with adequate 60-second curing cycles under dual-wavelength or portable light sources locks in shine and durability. By treating application and curing as complementary halves of the same process, you can achieve beautiful, resilient manicures in the comfort of your own home.





Write Your Review
No reviews yet. Be the first to share your experience!