


Cooking over a dark stovetop makes meal preparation frustrating and creates unnecessary kitchen safety hazards. When your overhead cooktop illumination suddenly goes dark, learning how to replace a kitchen hood light bulb becomes an immediate priority for restoring visibility over your burners. Many homeowners put off this quick maintenance task because range hood housings often position bulbs behind grease mesh filters, deep within recessed sockets, or inside tight metal enclosures. Understanding the proper base type, mechanical clearance, and safety precautions can simplify the entire swap so you can get back to cooking under clear, comfortable lighting.
Modern ventilation units utilize several distinct bulb styles, ranging from classic compact appliance globes to specialized twist-lock spotlights. Selecting the proper replacement involves balancing adequate working brightness with practical heat resistance, as cooktop vapors and ambient burner warmth place unique demands on appliance lighting. Upgrading from older incandescent options to efficient LED designs also introduces choices between bright task daylight and warm light bulbs for soft cozy lighting across your kitchen workspace. This guide includes independent editorial advice alongside affiliate product recommendations where qualifying purchases may support our work. Reviewing socket specifications and mechanical requirements before starting ensures your new bulb fits securely and operates reliably alongside your exhaust fan.


Practical Guide to Changing and Selecting Range Hood Light Bulbs
Replacing a burned-out range hood bulb requires paying attention to mechanical fit, base type, and operating temperature. Kitchen range hoods endure far more grease, humidity, and heat than ordinary living room lamps, which makes choosing the correct appliance-rated bulb crucial for long-term safety and performance. By taking a methodical approach to disconnecting power, accessing the socket housing, and matching technical specifications, you can complete the replacement quickly without damaging delicate range hood components.
Prioritizing Safety and Cooktop Preparation Before Removal
Safety must always come first whenever you service any electrical kitchen appliance. Start by cutting electrical power to the range hood, either by flipping the dedicated circuit breaker in your electrical service panel or by turning off the appliance isolation switch if one is installed nearby. Simply turning off the hood light switch is not always sufficient because accidental contact with the control or internal wiring faults could still pose an electrical shock hazard. Working on a de-energized fixture gives you complete peace of mind throughout the entire bulb replacement procedure.
Allow the old bulb to cool down completely before attempting to touch it with your bare hands. Traditional halogen and incandescent range hood bulbs reach scorching temperatures during standard operation and can easily cause painful burns if handled immediately after shutting them off. While waiting for the fixture to cool, clear your stovetop surface of all pots, pans, and cooking utensils. Laying a thick, soft towel over your ceramic glass cooktop or cast iron grates protects delicate cooking surfaces from dropped tools, falling screws, or accidental bulb breakage.
Identifying Bulb Base Types in Modern Range Hoods
Range hoods utilize several specific socket designs, and identifying which type your unit requires prevents frustrating purchase mismatches. Many traditional and transitional range hoods rely on standard screw-in Edison sockets, specifically the E26 medium base. Standard residential light bulbs usually share this base thread, but standard A19 household bulbs are frequently too tall or too wide to fit inside compact hood housings. Instead, appliance manufacturers specify smaller A15 profile bulbs that provide sufficient clearance within tight range hood recesses.
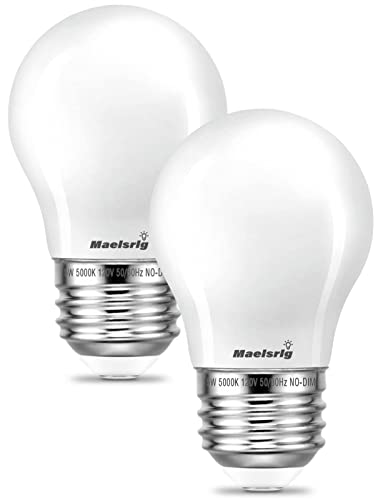
The compact design of the GIOVAR LED Range Hood Light Bulbs Replacement highlights how an A15 bulb meets these mechanical demands, measuring approximately 1.7 inches in diameter and 3.2 inches in height. Another common screw-in choice is the LED Appliance Bulb, 40W Equivalent from Maelsrlg, which also utilizes a standard E26 base with an A15 envelope. Both options thread into familiar screw sockets, making them direct drop-in replacements for standard appliance fixtures that accommodate screw-in formats.
Contemporary and high-performance range hoods frequently feature GU10 twist-lock bases rather than traditional threaded sockets. GU10 bulbs feature two short, stout pins with rounded nubs spaced 10 millimeters apart at the base of an MR16 reflector body. The LED GU10 Range Hood Light Bulbs from BOGAO represent this category, locking securely into place with a mechanical push-and-twist motion. Inspecting the socket receptacle visually or checking the label inside the hood chassis will confirm whether your system requires threaded E26 hardware or twist-in GU10 pins.
Accessing the Housing and Removing Difficult Bulbs
Reaching the bulb socket often requires disassembling part of the range hood underside. Most residential hoods position their lighting behind removable aluminum grease mesh filters or stainless steel baffle panels. Locate the spring-loaded release latches on your filters, pull the clips downward, and slide the panels away from the hood chassis to expose the internal light fixtures. In some designs, a secondary glass diffuser lens or protective metal bezel rings hold the bulb in place, requiring you to loosen small retaining screws or press quick-release clips.
Removing a threaded E26 bulb involves gripping the glass or plastic globe firmly and turning it counterclockwise until the threads release. Cooking oils and aerosolized grease frequently migrate past the housing seals, creating a sticky residue that can make threaded bulbs stubborn to unscrew. If the bulb refuses to budge under gentle finger pressure, wearing a pair of clean rubber-coated work gloves can provide the extra traction needed to break the sticky seal without cracking the envelope.
Extracting a recessed GU10 bulb requires a completely different physical technique because the front face of the bulb often sits flush with the metal hood surround. Attempting to grip the edge of a flush-mounted GU10 bulb with your fingernails is nearly impossible and can damage the fixture. Instead, use a specialized mini rubber suction cup, which comes packaged with bulbs such as the BOGAO model, to press firmly against the center of the flat glass lens. Once suction is established, push inward gently against the internal spring, rotate the bulb a quarter turn counterclockwise, and pull the pins straight out of the socket slots.
Inspecting Socket Contacts and Managing Kitchen Residues
Removing the spent bulb offers an ideal opportunity to inspect the electrical socket for grease accumulation, heat damage, and physical wear. Vaporized cooking grease naturally collects inside ventilation cavities and can settle onto electrical contacts over months of heavy frying. With the electrical circuit breaker verified off, take a dry, lint-free microfiber cloth and carefully wipe away surface grime around the outer socket collar. Never spray liquid cleaners or degreasers directly into the electrical socket opening, as residual moisture can provoke short circuits once power is restored.
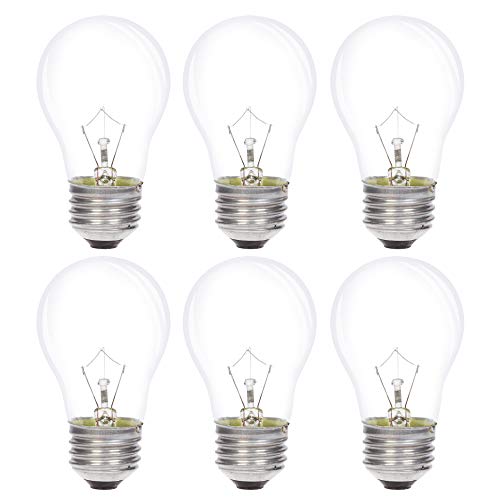
Examine the plastic or ceramic socket housing closely for signs of discoloration, brittleness, or melting. Years of operating high-wattage incandescent or halogen lamps generate intense localized thermal loads that can degrade plastic components over time. Homeowners interested in the thermal physics of legacy lighting can review how traditional bulb filaments operate to understand why incandescent designs shed so much energy as waste heat. If your socket shows severe scorching, crumbling plastic, or loose wire terminals, replace the socket assembly before installing a new bulb.
Inspect the metal electrical contacts inside the receptacle to guarantee proper mechanical tension. In traditional E26 sockets, the small copper contact tab at the center bottom can become flattened over years of over-tightening old bulbs. When this tab sits completely flat, a newly inserted replacement may fail to make solid electrical contact, causing the fixture to stay dark. If necessary, you can gently pry the center tab upward a millimeter or two using a wooden toothpick or small insulated probe while power is completely disconnected.
Evaluating Brightness and Lumens for Cooktop Illumination
Selecting the appropriate brightness level ensures you have adequate visual clarity while cooking without creating harsh, uncomfortable glare. Consumers historically relied on wattage to judge brightness, but wattage measures electrical power consumption rather than actual light output. Modern LED appliance bulbs produce equivalent or superior illumination while consuming a small fraction of the electricity required by legacy incandescent bulbs. Today, luminous flux, measured in lumens, serves as the true standard for evaluating how much light a bulb emits over your cooking surface.
A typical 40-watt equivalent LED appliance bulb, such as the 5-watt Maelsrlg or GIOVAR models, provides approximately 500 lumens of light output, which works well for standard dual-bulb range hoods. Directional GU10 options like the 6-watt BOGAO model emit around 550 lumens, functioning as an energy-efficient alternative to 50-watt halogen bulbs. In addition to raw lumens, consider the beam angle of the bulb design. Directional spotlights with a 45-degree beam angle focus intense light directly down onto frying pans, whereas omnidirectional A15 bulbs cast a broad, diffuse wash across the entire cooktop and surrounding counters.
Selecting the Right Color Temperature for Food Preparation
Color temperature dramatically affects how your kitchen looks and how accurately you can judge the doneness of food on your stove. Measured on the Kelvin scale, color temperature describes the visual warmth or coolness of the emitted white light. Warm options, such as 2700K soft white found on the GIOVAR A15 bulb, produce a cozy, amber-tinted glow reminiscent of traditional incandescent filaments. This warm appearance blends seamlessly with surrounding residential living spaces and minimizes harsh contrast when preparing late-night meals or entertaining guests.
For cooks who prefer balanced clarity without extreme warmth or clinical coolness, 3000K warm white, as featured on the BOGAO GU10 bulbs, provides an excellent middle ground. This color range renders food colors naturally while maintaining a welcoming atmosphere. At the opposite end of the spectrum, 5000K daylight white, found on the Maelsrlg appliance bulb, creates a crisp, energetic visual field with cool blue undertones. Daylight illumination excels at high-contrast task lighting, making it easy to spot minute color changes when searing meats, browning butter, or chopping fine herbs.
Understanding Appliance Heat Ratings and Environmental Limits
Cooktop ventilation fixtures subject bulbs to harsh operational conditions that standard indoor lamps never experience. Rising steam, grease vapors, and intense radiant heat from gas burners or induction surfaces create an aggressive environment. Quality appliance bulbs feature specified working temperature ranges, such as -13°F to 113°F for the Maelsrlg model, or -4°F to 130°F for the GIOVAR bulb. These thermal ratings ensure that internal LED drivers and solid-state capacitors can withstand typical cooktop warmth without suffering premature component failure.
A vital distinction must be maintained between range hood appliance bulbs and true oven cavity bulbs. Although bulbs like the Maelsrlg and GIOVAR models are marketed for refrigerators, freezers, and stove hoods, manufacturer specifications explicitly state they cannot be installed inside an oven. Oven temperatures easily exceed 300°F during baking and roasting, which instantly melts plastic diffusers and destroys semiconductor circuits. Range hood bulbs must only be deployed on the exterior ventilation canopy above the stove, never inside closed heating chambers.
Moisture resistance represents another critical specification when selecting illumination for a kitchen hood. Boil-overs and simmering stockpots send dense columns of steam upward toward the exhaust intake, which can cause condensation on cool fixture surfaces. Choosing replacement bulbs with waterproof ratings or sealed polycarbonate housings, such as the IP65-rated BOGAO GU10 or the fire-retardant PC cover on GIOVAR bulbs, prevents moisture ingress. You can discover more about the interplay between heat and fixture longevity in our guide exploring fixture heat and thermal wear.
Matching Range Hood Dimmer Switches and Multi-Level Controls
Range hood switch mechanics differ substantially from standard living room wall controls, making dimmer compatibility an essential consideration. Many range hoods feature simple multi-position rocker switches that offer High, Low, and Off settings rather than smooth continuous slider controls. These low-level settings often reduce voltage using internal diodes or secondary resistor circuits, which can interact unpredictably with electronic LED drivers. Checking whether your ventilation hood features multi-level light controls helps you select a bulb with the correct electrical characteristics.
Installing a non-dimmable bulb on a fixture with variable brightness controls can lead to noticeable performance problems. For example, the Maelsrlg 5000K daylight bulb and the GIOVAR 2700K bulb are both explicitly designated as non-dimmable by their manufacturers. When a non-dimmable LED receives reduced voltage from a low-setting hood switch, it may buzz loudly, strobe uncontrollably, or shut down entirely. These bulbs operate best in range hoods equipped with straightforward single-stage on-and-off switches where consistent line voltage is maintained.
If your range hood features a dual-brightness toggle or an integrated continuous dimmer, choosing dimmable hardware is necessary. The BOGAO GU10 range hood bulb is specifically manufactured with dimmable driver circuitry, allowing it to adjust smoothly across different voltage levels without buzzing or flickering. Matching the dimming capability of your replacement bulb to the electrical design of your hood switch prevents annoying electronic noise and protects the LED driver from electrical stress.
Installing the Replacement Bulb and Restoring Fixture Operation
Once you have selected the appropriate replacement, installing the new bulb is straightforward if you take your time. Ensure your hands are clean and dry, or put on a pair of clean cloth gloves to keep skin oils and kitchen grease off the new bulb envelope. For threaded E26 A15 bulbs, align the brass base straight into the socket opening and turn it clockwise by hand. Screw the bulb in smoothly until it seats firmly against the bottom contact tab, but avoid using excessive force that could crack the socket housing or strip the base threads.
For GU10 twist-lock replacements, line up the two brass pins with the wider entry notches in the ceramic socket. Push the bulb inward gently against the internal spring tension, then rotate the bulb clockwise approximately a quarter turn until the pins lock firmly into their retaining channels. If the fixture housing is recessed and tight, reattach the small rubber suction cup tool to the flat front face of the bulb to maintain control and leverage throughout the twisting motion. Once seated, remove the suction cup by peeling its edge sideways to break the vacuum seal.
Reassemble the range hood by wiping down any protective glass lenses and reinstalling your aluminum mesh or stainless steel baffle filters. Ensure the filter retaining clips click securely into position so the panels cannot vibrate loose when the exhaust fan runs. Go to your electrical service panel, restore power to the circuit breaker, and test the light switch across all operational settings. Cycle through your fan speeds as well to verify that mechanical motor vibrations do not cause flickering or intermittent connections in the newly installed lighting.
Troubleshooting Flickering and Inoperative Range Hood Lighting
If your newly installed bulb fails to turn on after restoring power, a few basic checks can isolate the problem quickly. First, confirm that the circuit breaker did not trip during the process and verify that power is reaching the hood controls. If the exhaust fan operates normally but the light remains dark, turn off power again and confirm that the bulb is screwed or twisted completely into the socket. A threaded E26 bulb that is slightly loose will fail to bridge the gap to the center contact tab, preventing current flow.
Persistent flickering or audible buzzing typically points toward electrical compatibility issues or mechanical vibration. If your range hood features a multi-stage light switch, check whether the flickering happens only on the low setting, which indicates an incompatible non-dimmable driver. Rapid strobing when the exhaust fan runs on high speed can also indicate a loose socket bracket or worn wiring harness inside the hood chassis. If testing the bulb in another standard lamp confirms that the bulb itself functions properly, consult a licensed electrical professional to inspect the internal range hood switch and wiring.
Responsible Disposal, Cleaning, and Fixture Upkeep
Disposing of your old range hood bulbs responsibly prevents environmental contamination and physical injury. Traditional incandescent and halogen bulbs contain non-hazardous materials and can generally be wrapped in newspaper and placed in household trash, though checking local municipal regulations is always recommended. If you are replacing an older compact fluorescent bulb, never throw it into household trash because CFLs contain small amounts of mercury vapor. Take spent CFLs and modern LED bulbs with complex electronic driver boards to dedicated municipal recycling facilities or hardware store collection points.
Maintaining your range hood lighting requires minimal effort but significantly extends the lifespan of your fixtures. Clean your aluminum grease filters regularly in warm soapy water or run them through the dishwasher according to manufacturer guidelines. Keeping filters clear reduces thermal buildup inside the hood canopy, allowing LED components to run cooler and last longer. A quick monthly wipe of the exterior light diffusers with a damp microfiber cloth keeps light transmission bright, ensuring your stove remains perfectly illuminated for every culinary task.




Write Your Review
No reviews yet. Be the first to share your experience!